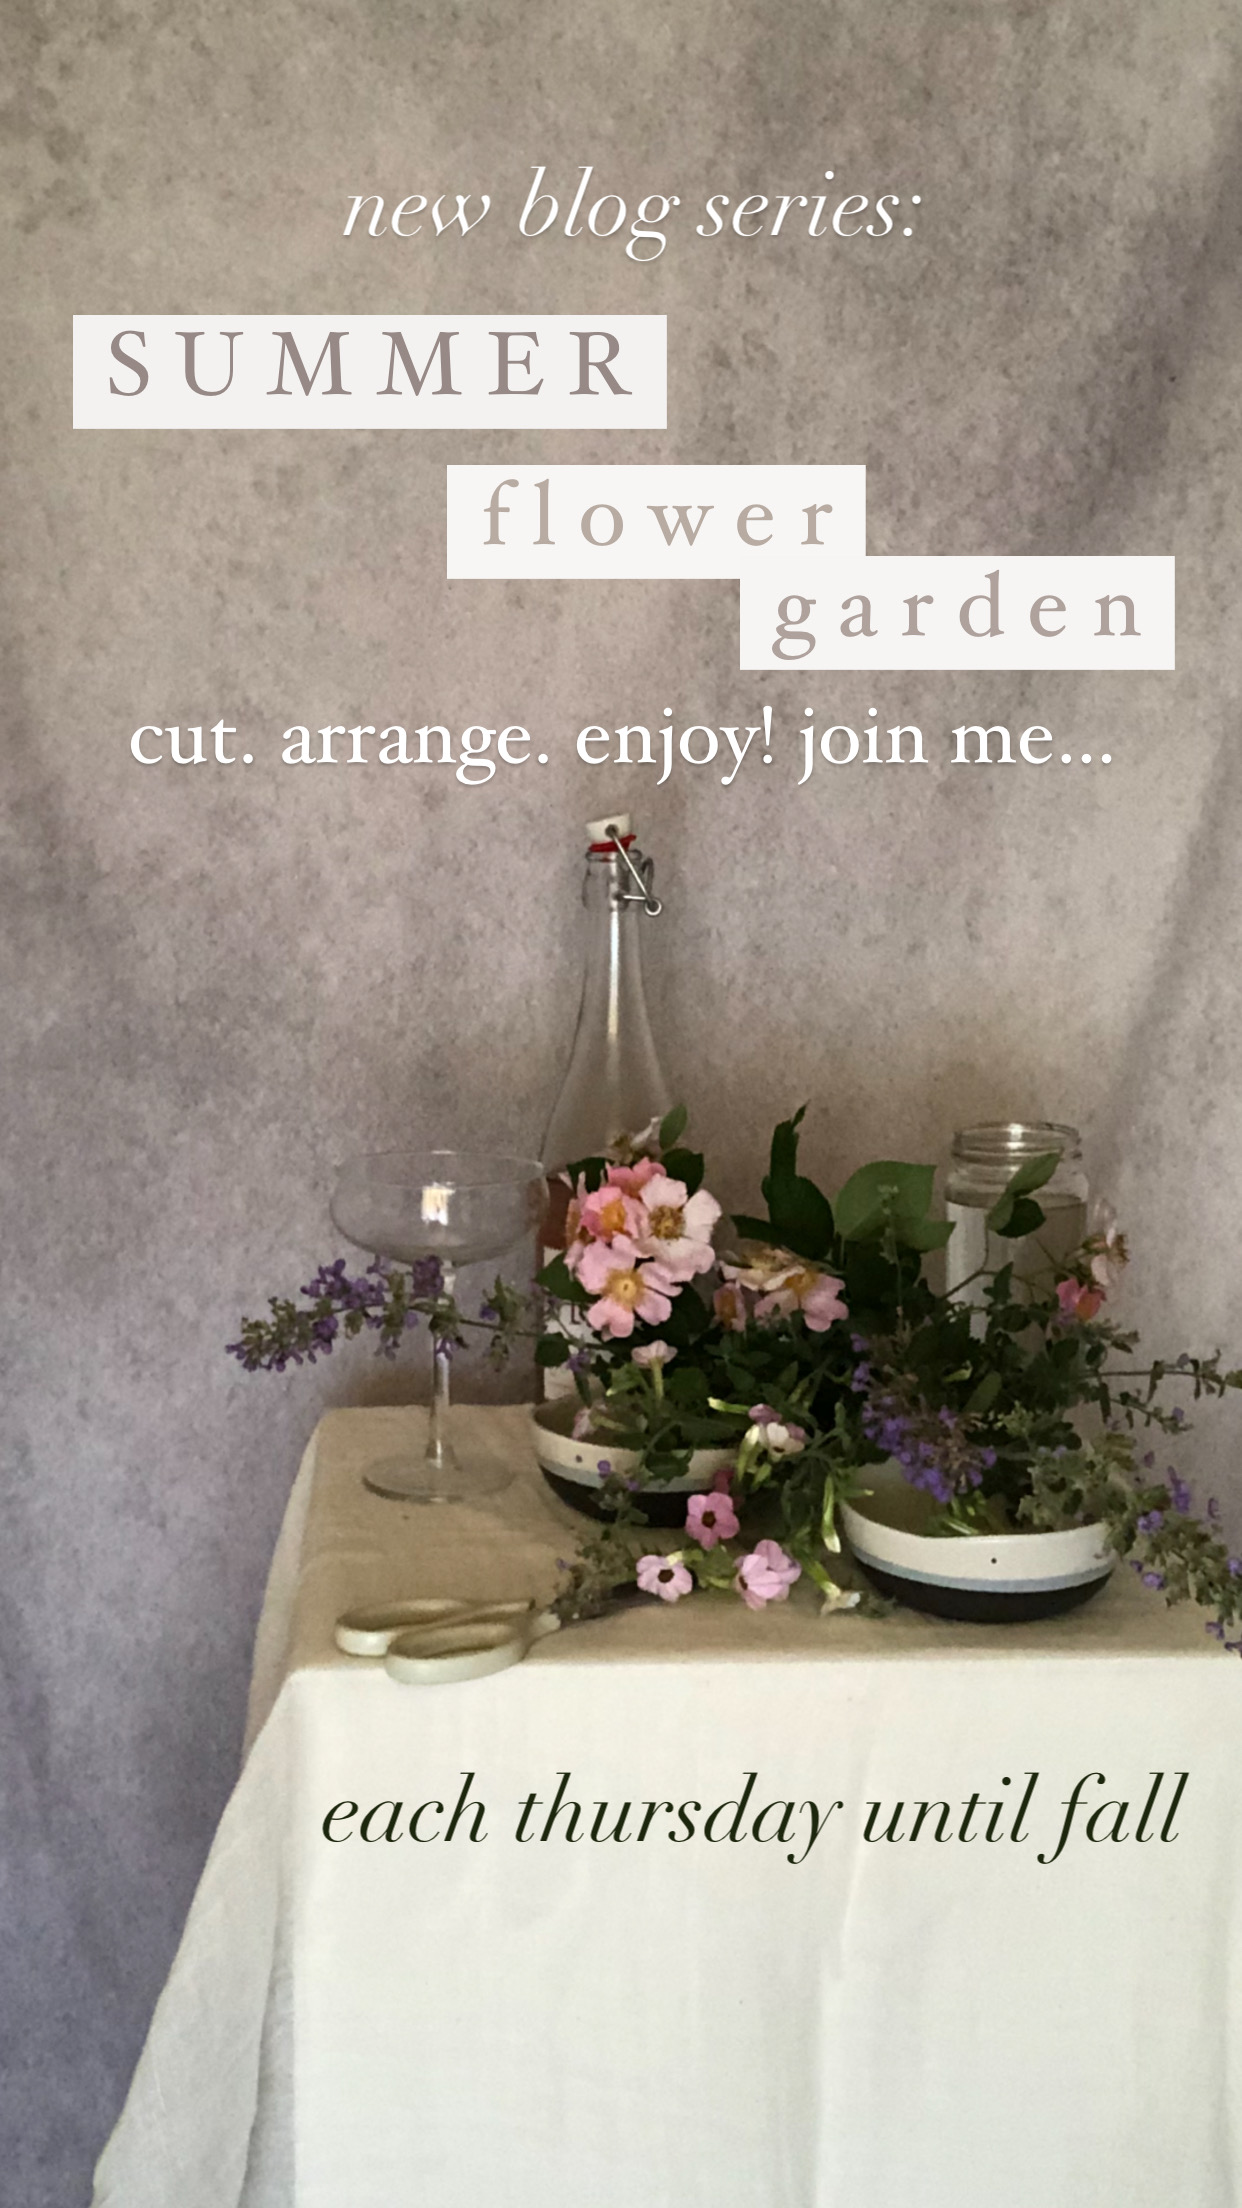
cut. arrange. enjoy!
Happy summer! For me, the best time of year because all the flowers are blooming! I wanted to do a flower garden series for so long, and finally this summer… we are doing it! Please join me each Thursday until fall here and on IG where I’ll be picking from the garden, arranging the flowers, and enjoying them as long as I can.
Here, on the blog, is where I’ll go into more details about the flowers and arrangements. Over on IG, is where I’ll share a reel video of me designing the arrangements. As always drinks are included ;-). So grab some flowers and join me as we enjoy summer even more – with flowers!
june flowers
THE CLIMBING ROSE ARRANGEMENT
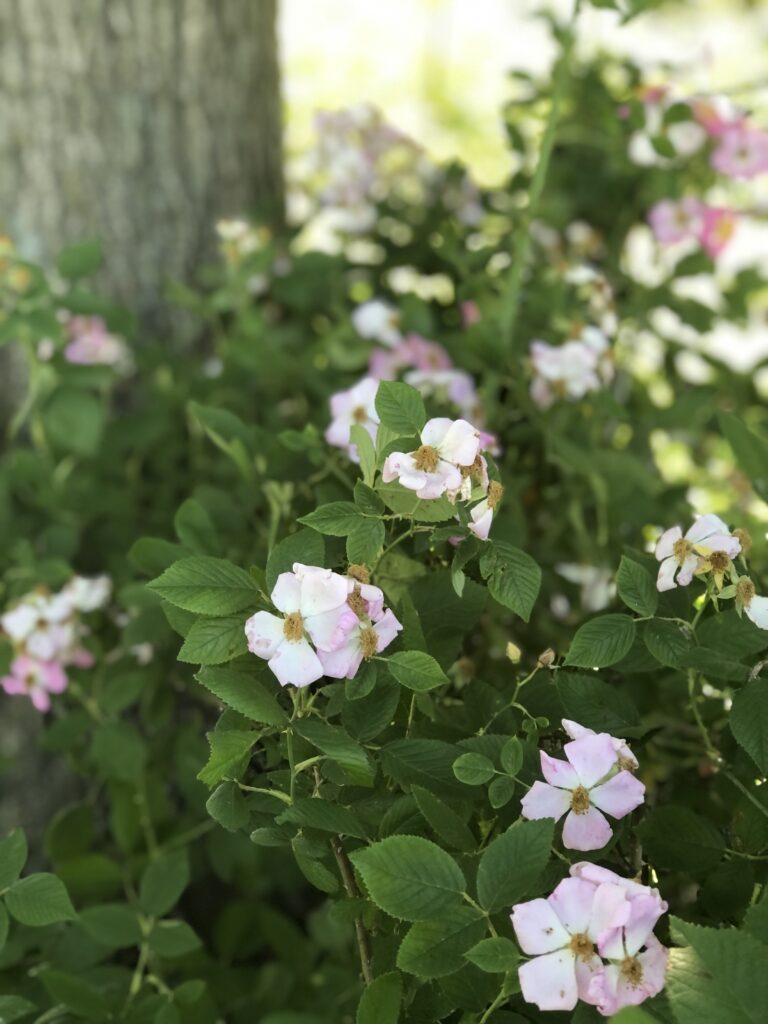
if growing: give a fence/pole to grow on. if picking: beware of the thorns.
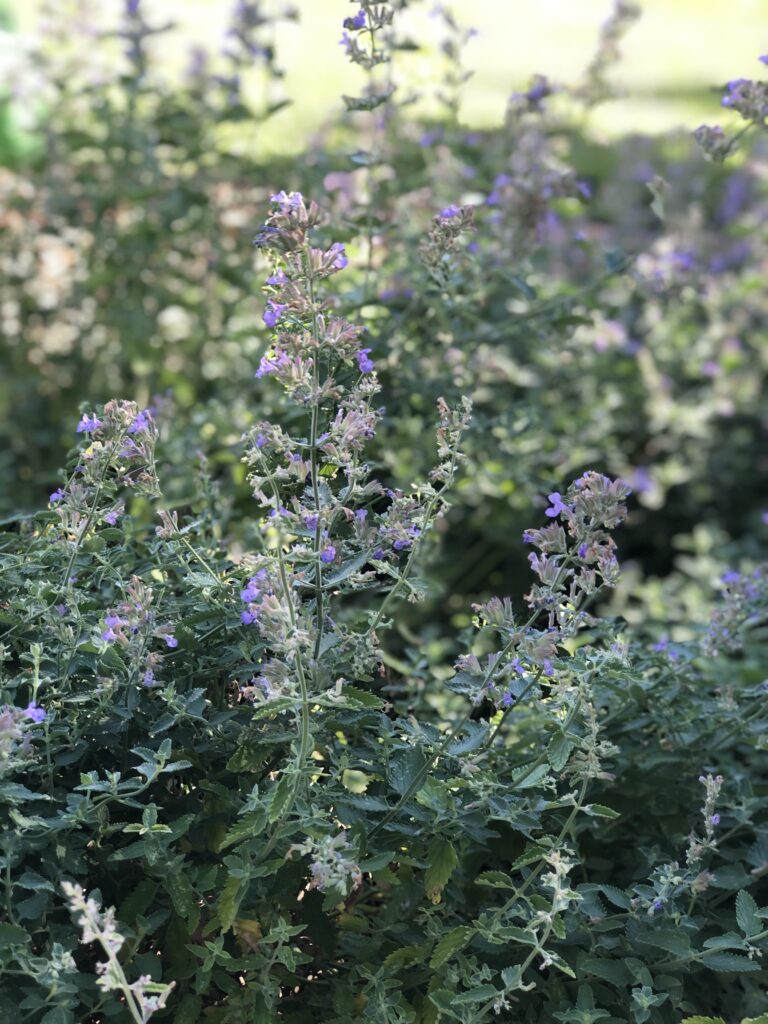
if growing: give space to expand / grow bigger. if picking: remove extra stem greenery before arranging.
We do not want any extra greenery in the container water. That can cause the water to form bacteria which reduces flower life. All we want in the container with your water is the pure flower stem.
Up first, will be our climbing rose arrangement. These roses are beautiful and come back each year with little maintenance. They will bloom for quite a while with June being prime blooming time. They are covered in thorns which is an unfortunate part of roses, so be careful when arranging – it hurts getting one in your finger (as always when working with outside flowers, it is best to wear gloves).
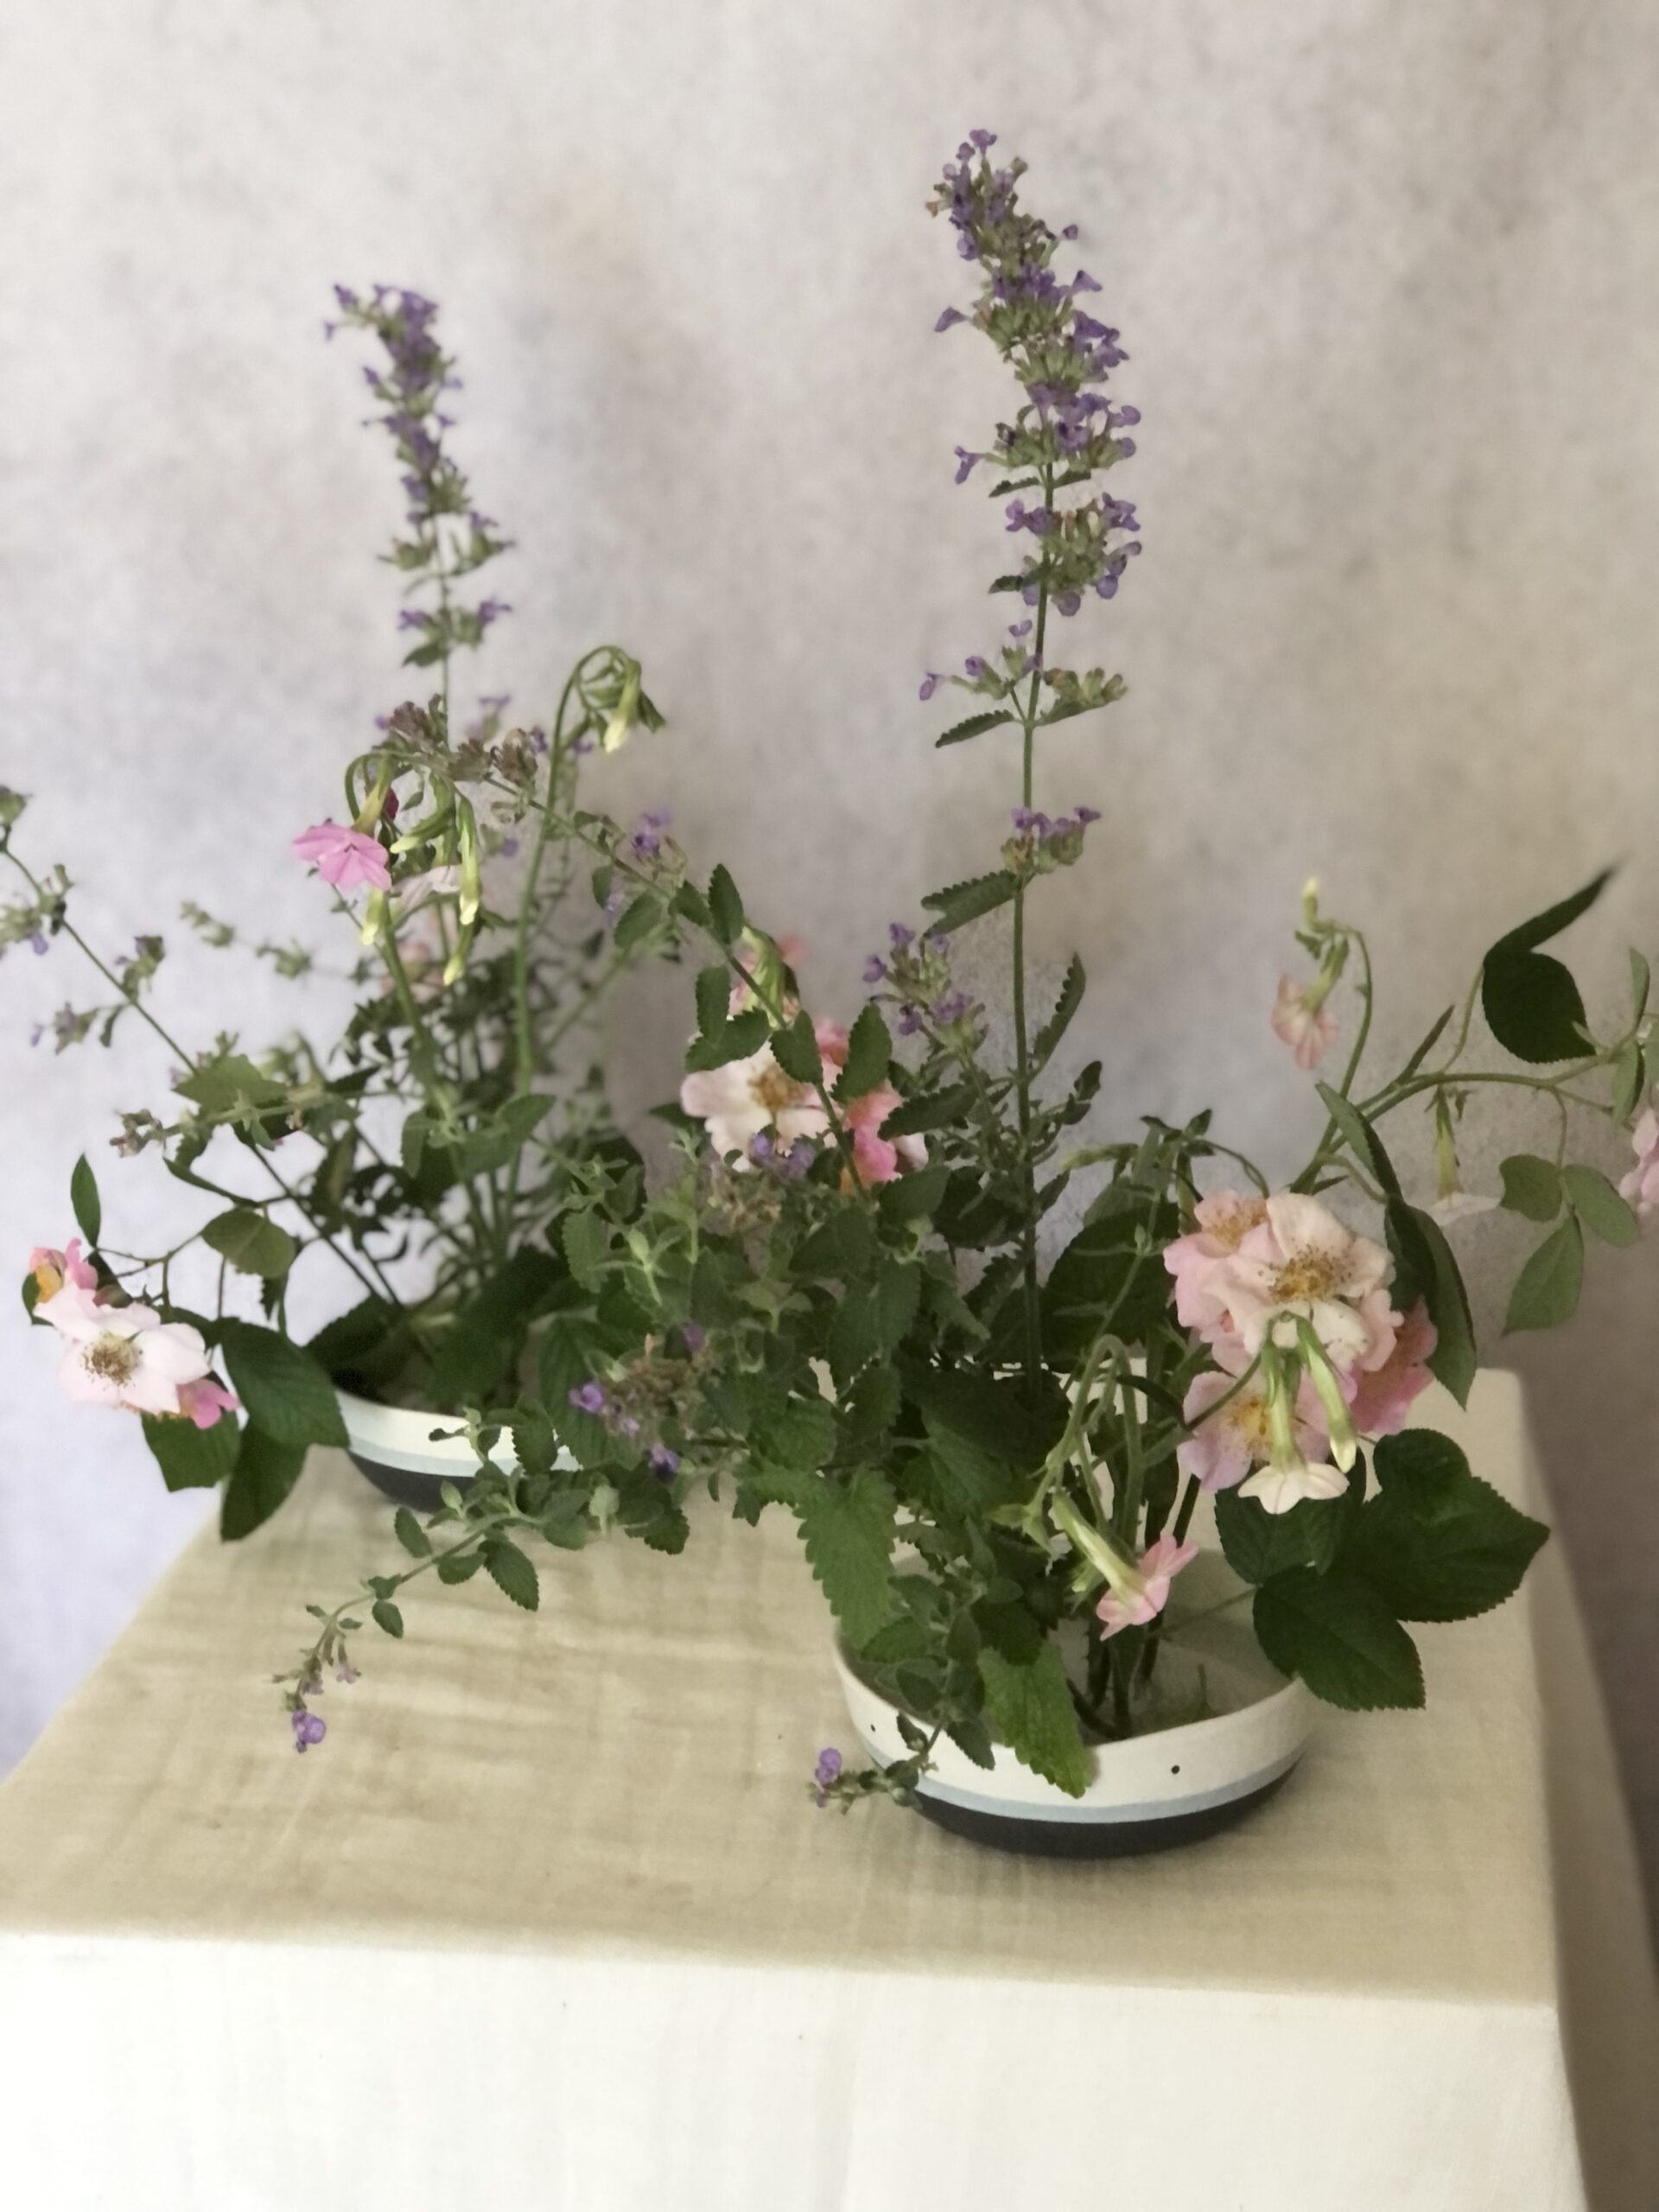
For arranging, I’m using 2 smaller bowls with a flower frog inside. These are actual bowls, so don’t feel like you need to go out and purchase new containers – take a look in your kitchen to see what you have. As long as the sides are tall enough to hold enough water then you can use it.
LETS TALK ABOUT FLOWER FROGS: if you are an avid at home flower arranger, then I highly suggest purchasing a frog and the putty to secure it to your container. If you pick a container you love and want to use all the time, secure the frog inside, then you’ll be good to go. All you’ll have to do is grab your container, fill with water, and arrange. This is what I do rather than taping up a container or using oasis foam. If you can get the clear plastic like frogs, do it. The more common metal ones will rust. It can take a little practice to get the feel for using a frog, so allow yourself some practice time. Don’t worry if the flowers fall, it happens – just put it back in.
Okay, back to the arranging!
WHAT I USED FOR THIS ARRANGEMENT:
- climbing rose in pink, perennial – long lasting
- greenery bush / blooming in purple, perennial – long lasting (salvia variety in big blue – similar to lupine or bluebeard)
- flowering tobacco in pink, annual from seed – has a wilting look
- 2 bowls and flower frogs, you can arrange in any type of container you’d like
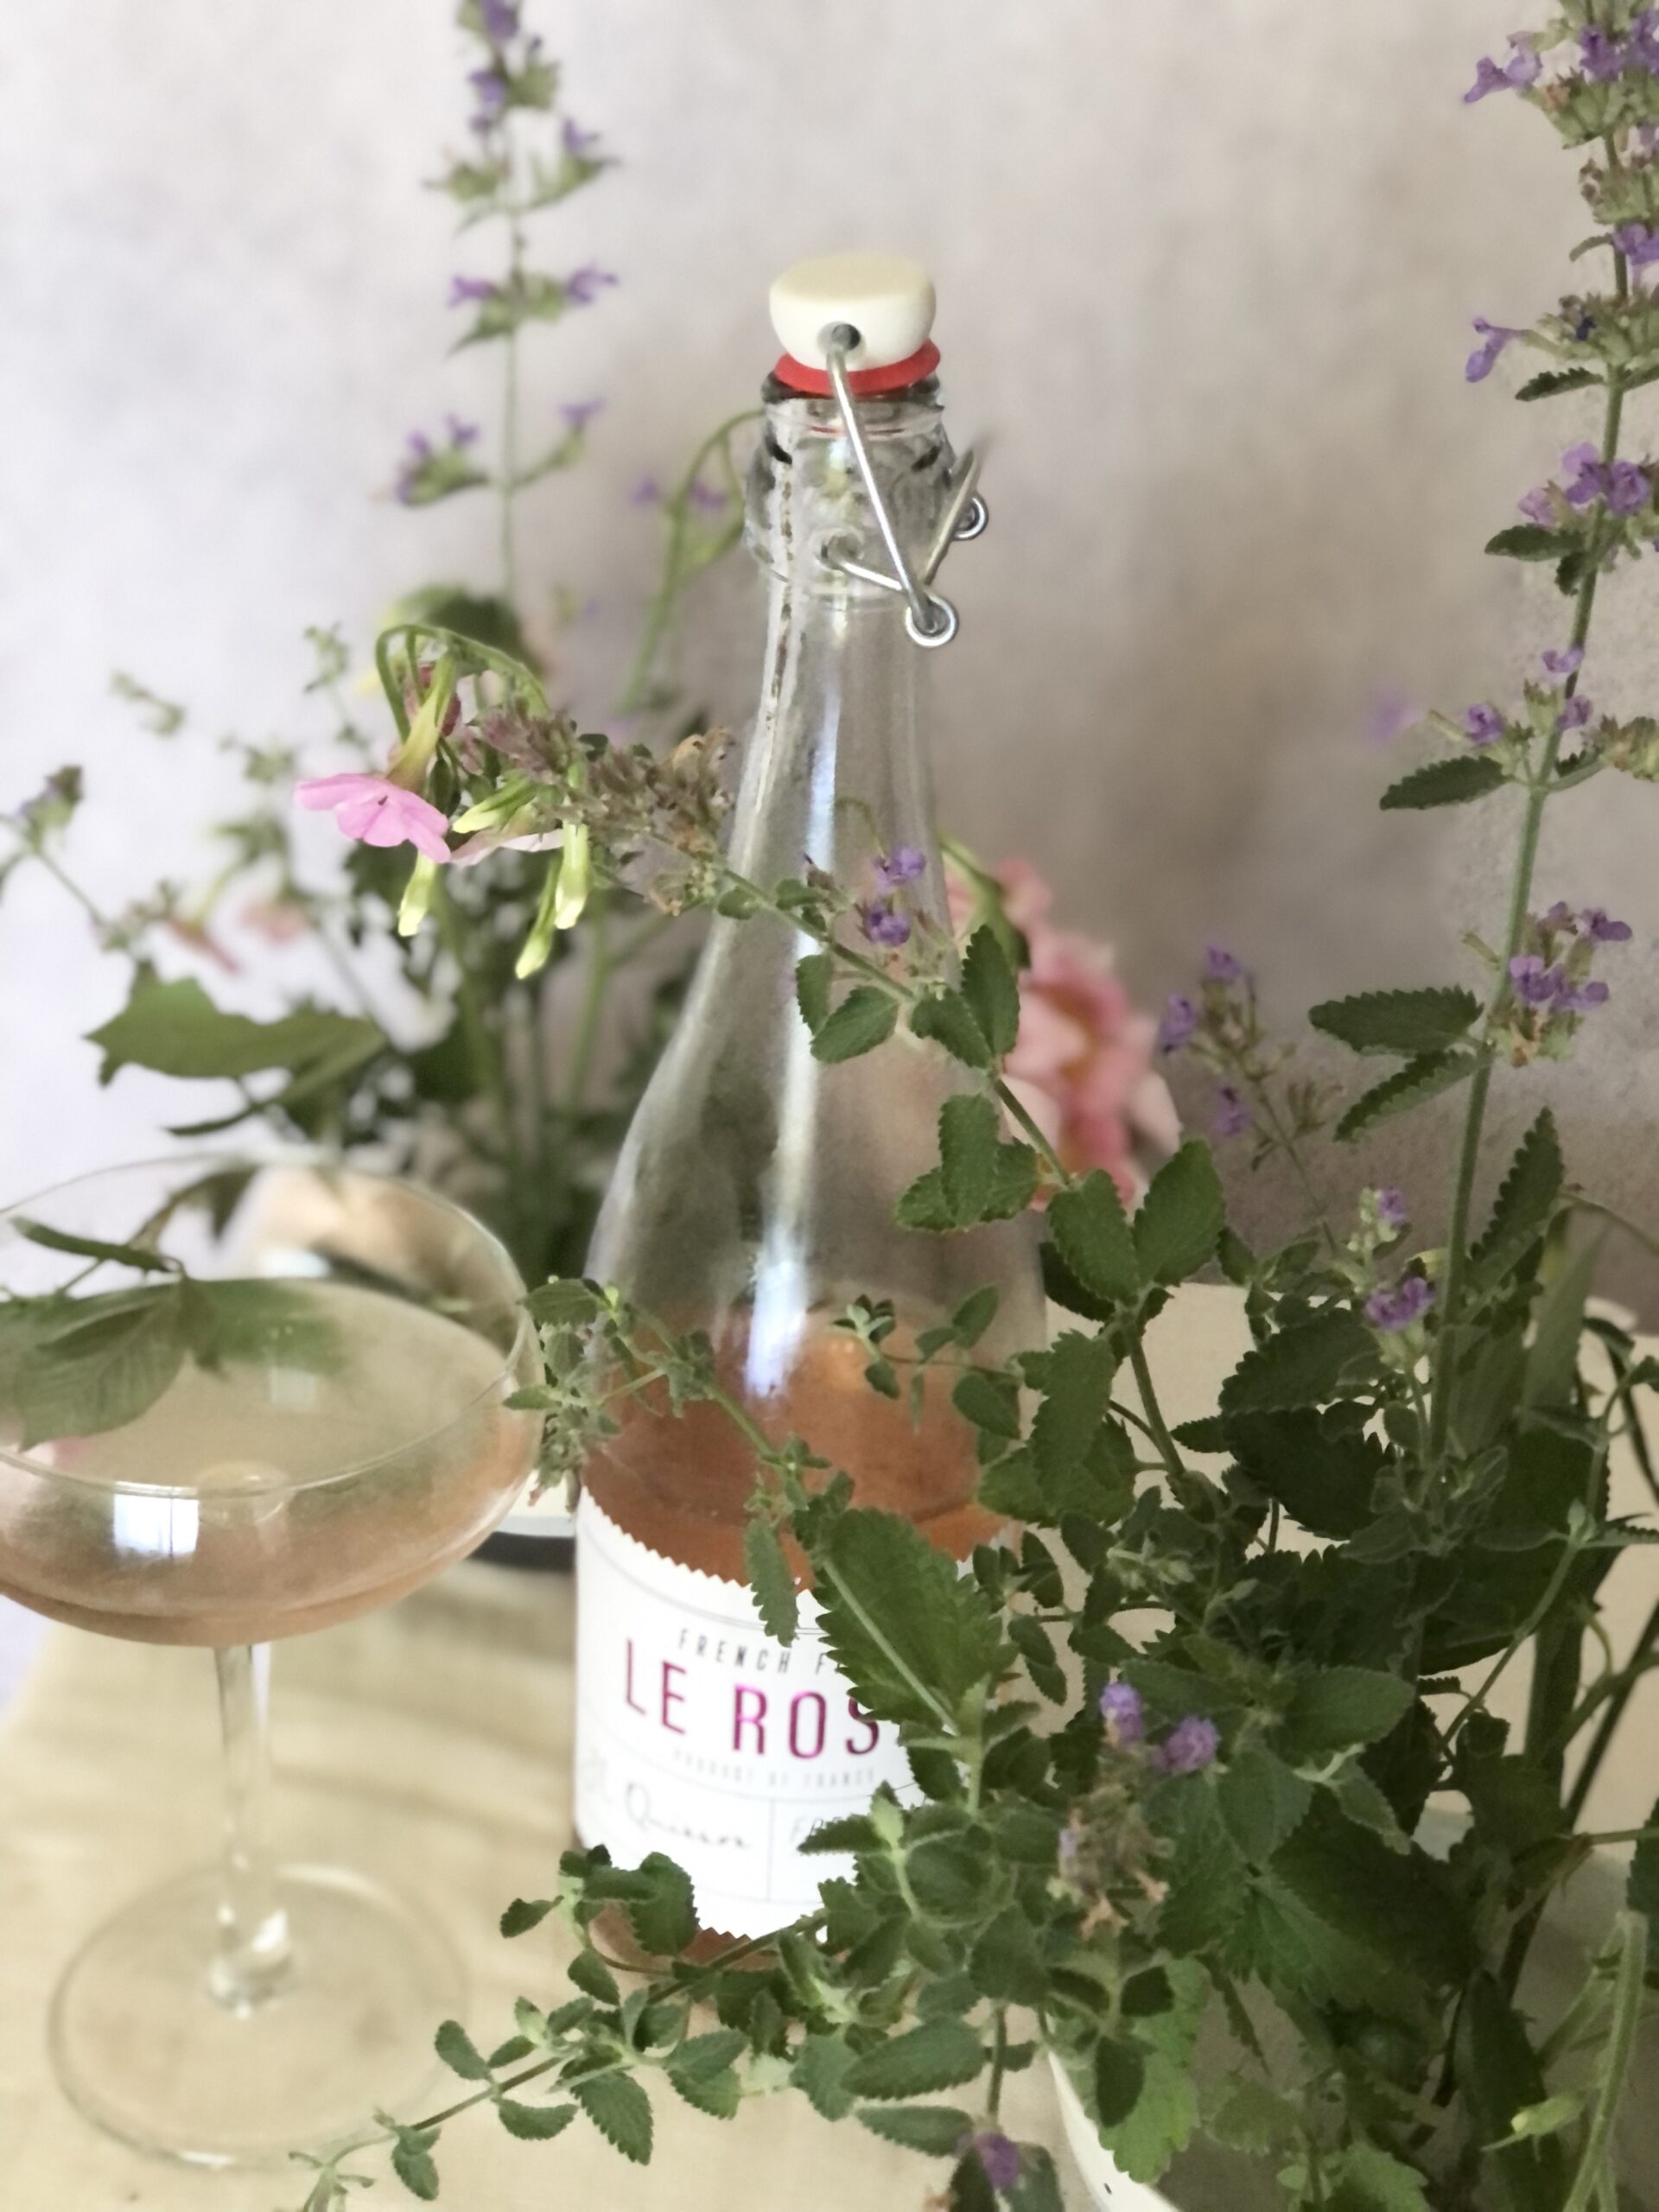
WHAT I’M DRINKING: Trader Joe’s French Fizz Le Rose, light, crisp, $7 – for the price, it’s good!
Watch the arranging reel video on IG. I used about a handful (4-8 stems) of each flower or whatever I had growing. There’s no exact recipe or right way to arrange. The whole point is to enjoy the process – enjoy the growing, enjoy the harvesting / picking, and enjoy the arranging. I will give some design tips, but I’ve found the most enjoyable way is to do what feels natural to you.
DESIGN TIPS FOR THIS ARRANGEMENT:
- use the roses closer to the base of your container while the more airy pieces can be used for height
- angle your stems into the frog at all different points around your container to help give a more natural, garden feel

I hope you can get out to pick (or purchase) some flowers and arrange with me! If you do, please email me photos or tag on IG @ oliveandgene and comment below if you have any questions or would like to see a certain type of arrangement – we have all summer long 🙂
June Arrangement number two
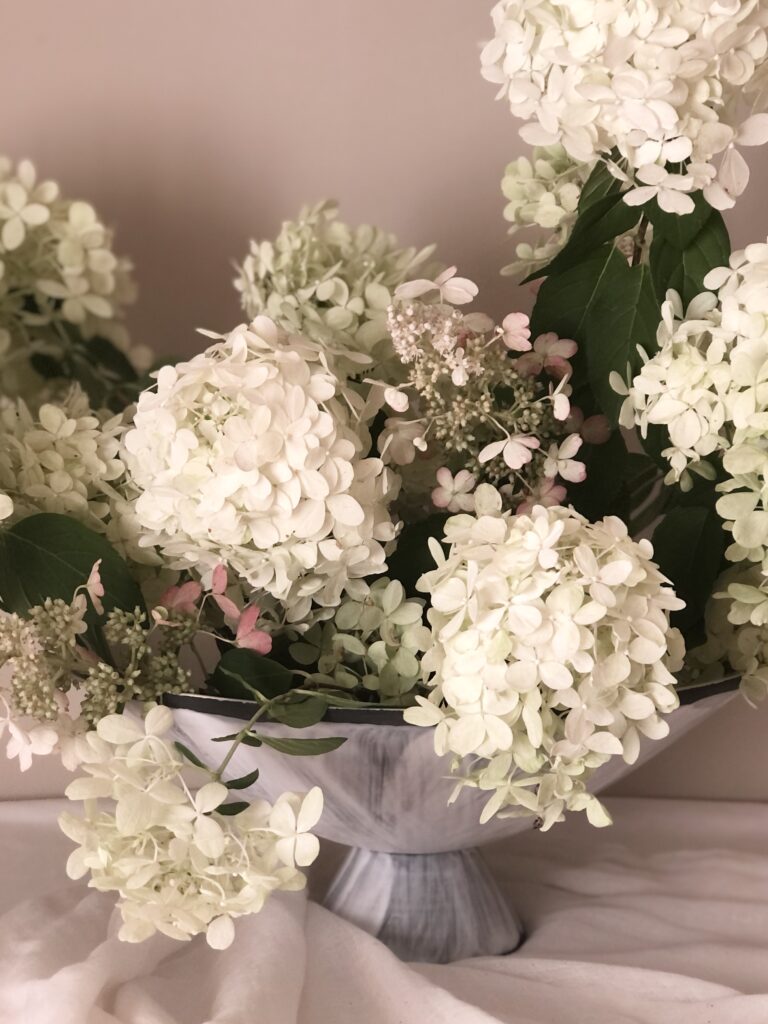
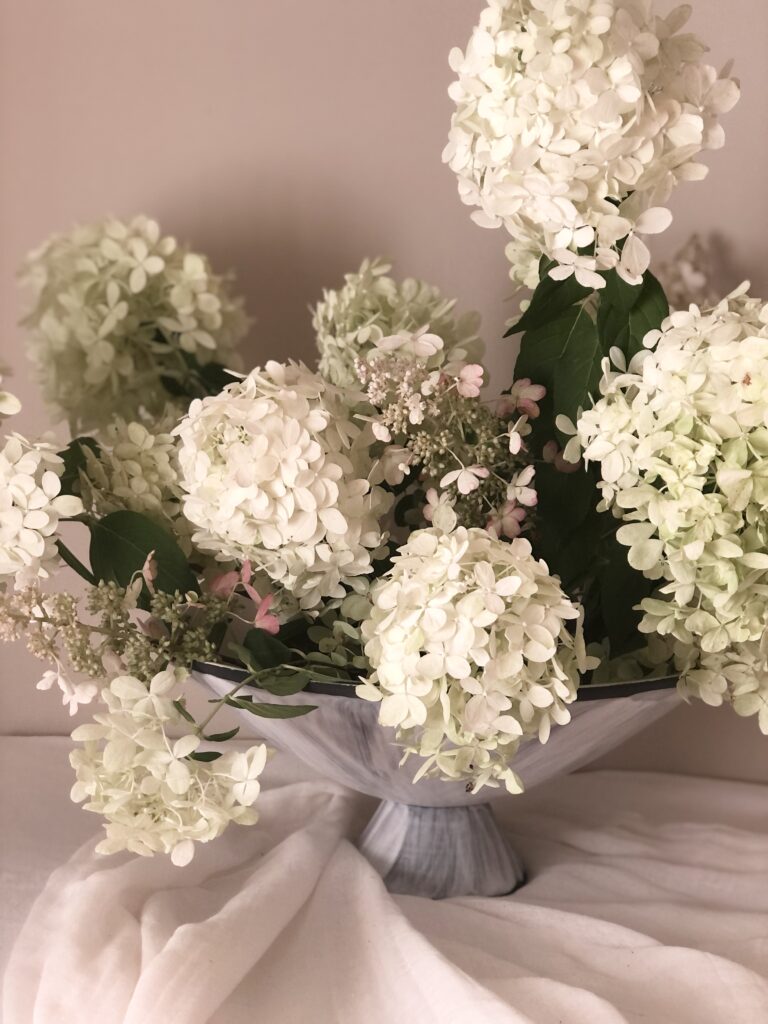
THE WHITE HYDRANGEA ARRANGEMENT
hydrangea – if growing: cut back in the fall for new bloom the next year. if picking: soak bloom head in water to help prevent wilting

gooseneck – if growing: spreads easily for a great ground covering. if picking: remove excess greenery before arranging
Both of these plants, hydrangea and gooseneck can be a great covering for a larger area. If you want to contain the plant growth to a smaller space, you will need to cut back / remove the plants you don’t want.

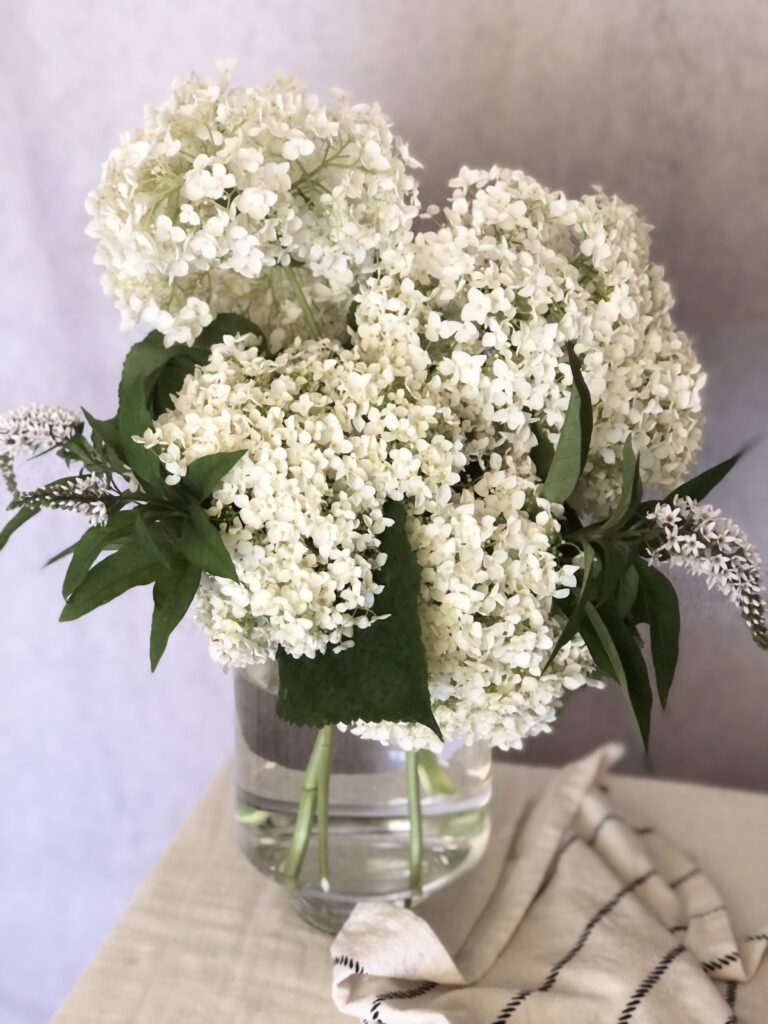
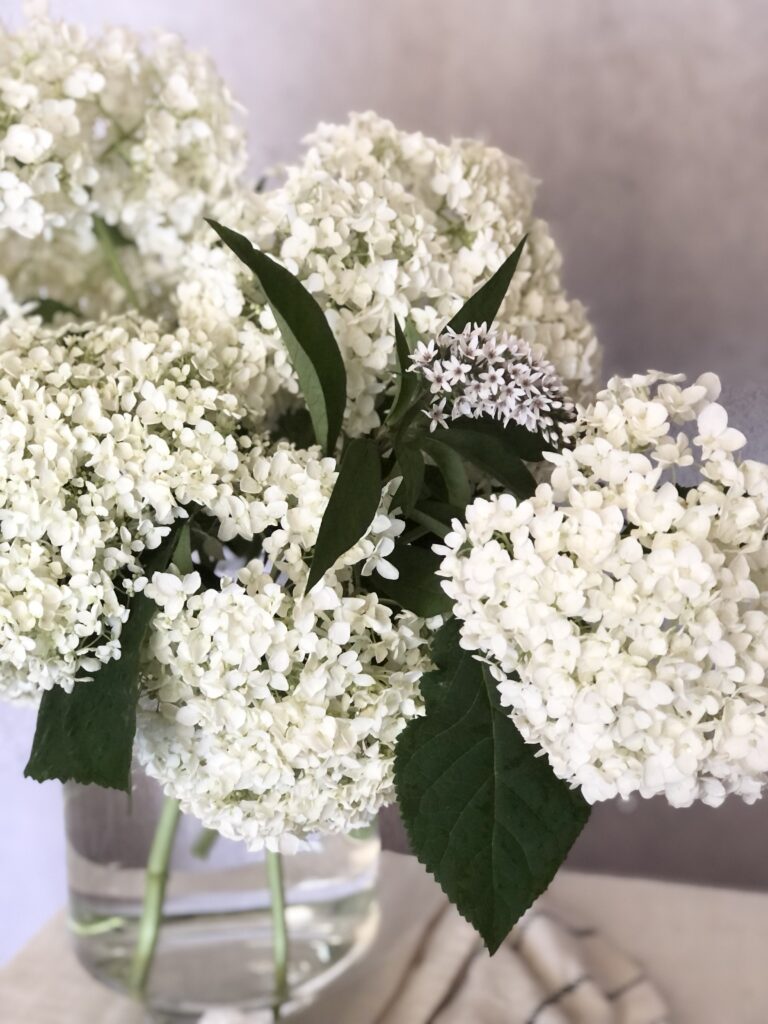
Our second summer flower garden arrangement is the white hydrangea with gooseneck as an accent flower. To me, this is a summertime classic flower combo. The big, fluffy hydrangea always make me think of summer. Both of these plants are easy to maintain and will grow out to cover some space if allowed.
For arranging, I’m using a larger clear glass vase with a taped cross pattern along the vase opening. When using larger vases, the tape method as your support to hold your flowers in place is an easy and effective go-to. Be careful to not get your tape wet as this will make it more likely to loose it’s stickiness. I will put water in my vase first, wipe down the sides, then apply the tape. Depending on how large your vase is will determine how much tape you use, but a good measure is 2 pieces going each direction (4 pieces total).
WHAT I USED FOR THIS ARRANGEMENT:
- white hydrangea, perennial – semi long lasting (hit or miss on these)
- white gooseneck, perennial – long lasting (similar to Veronica flower – what I buy at the flower market)
- larger vase with tape cross pattern
WHAT I’M DRINKING: cola float! Fill a cup half way up with vanilla ice cream then top with cola of your liking. I used the Oli Pop vintage cola because I wanted to try it and it was really tasty (I will say it’s not my favorite to drink alone, but mixed with ice cream is good)!
Watch my designing video over on IG reels to see how it all comes together! What I love about this arrangement is it can be as big or small as you’d like it to be depending on how many hydrangea you want to use.
DESIGN TIPS FOR THIS ARRANGEMENT
- for me hydrangea can wilt quickly so if you want this arrangement for an event, I would not cut until the day of just in case they wilt
- as always, remove all stem greenery that is going into water plus I usually remove most of the top greenery as well just keeping a few leaves at the top
- since hydrangea have large blooms, cut the stems at all different heights so when you place then in the vase they will be layered, not bunched together
- place your tallest stem in the middle, then work around with shorter and fill in with the gooseneck- remember have fun as there isn’t a right or wrong way to design your arrangement
I would love to know what your summertime classic flower is?! When you think of summer flowers, what classic flower comes to mind… comment below or join in on the videos on IG @ oliveandgene.
july flowers
THE COLORFUL LILY ARRANGEMENT
Lilies- if growing: hardy plant, easy to grow. if picking: they don’t have a long vase life.
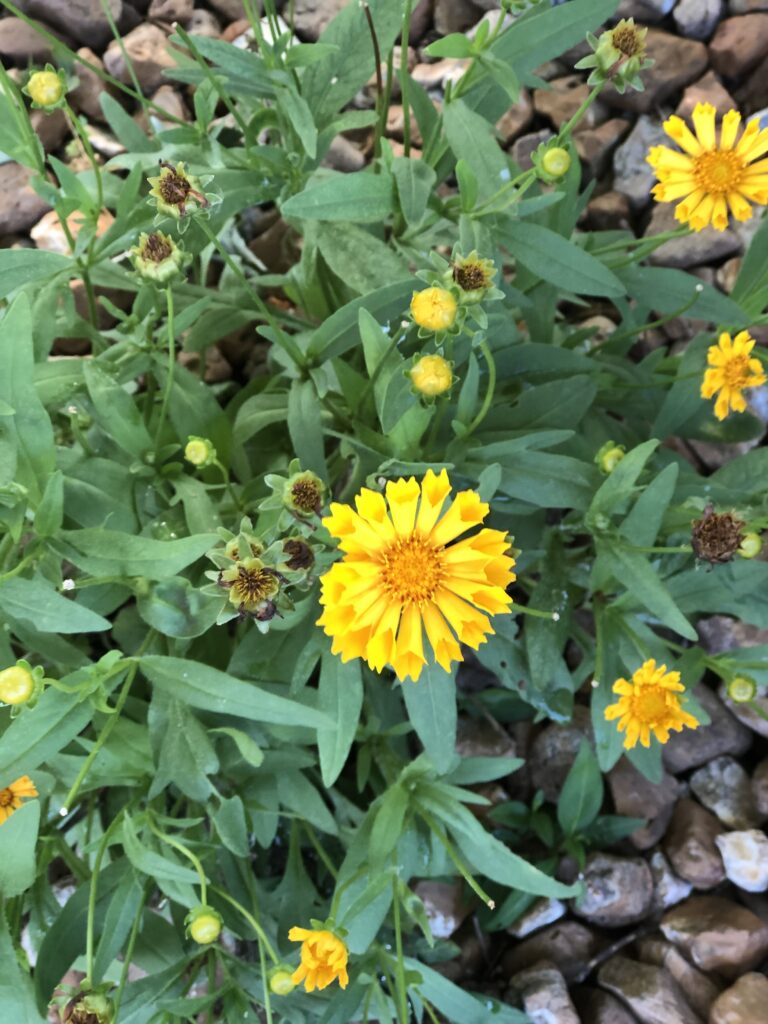
yellow mini daisy variety – if picking: has a more delicate, tiny stem to arrange with.
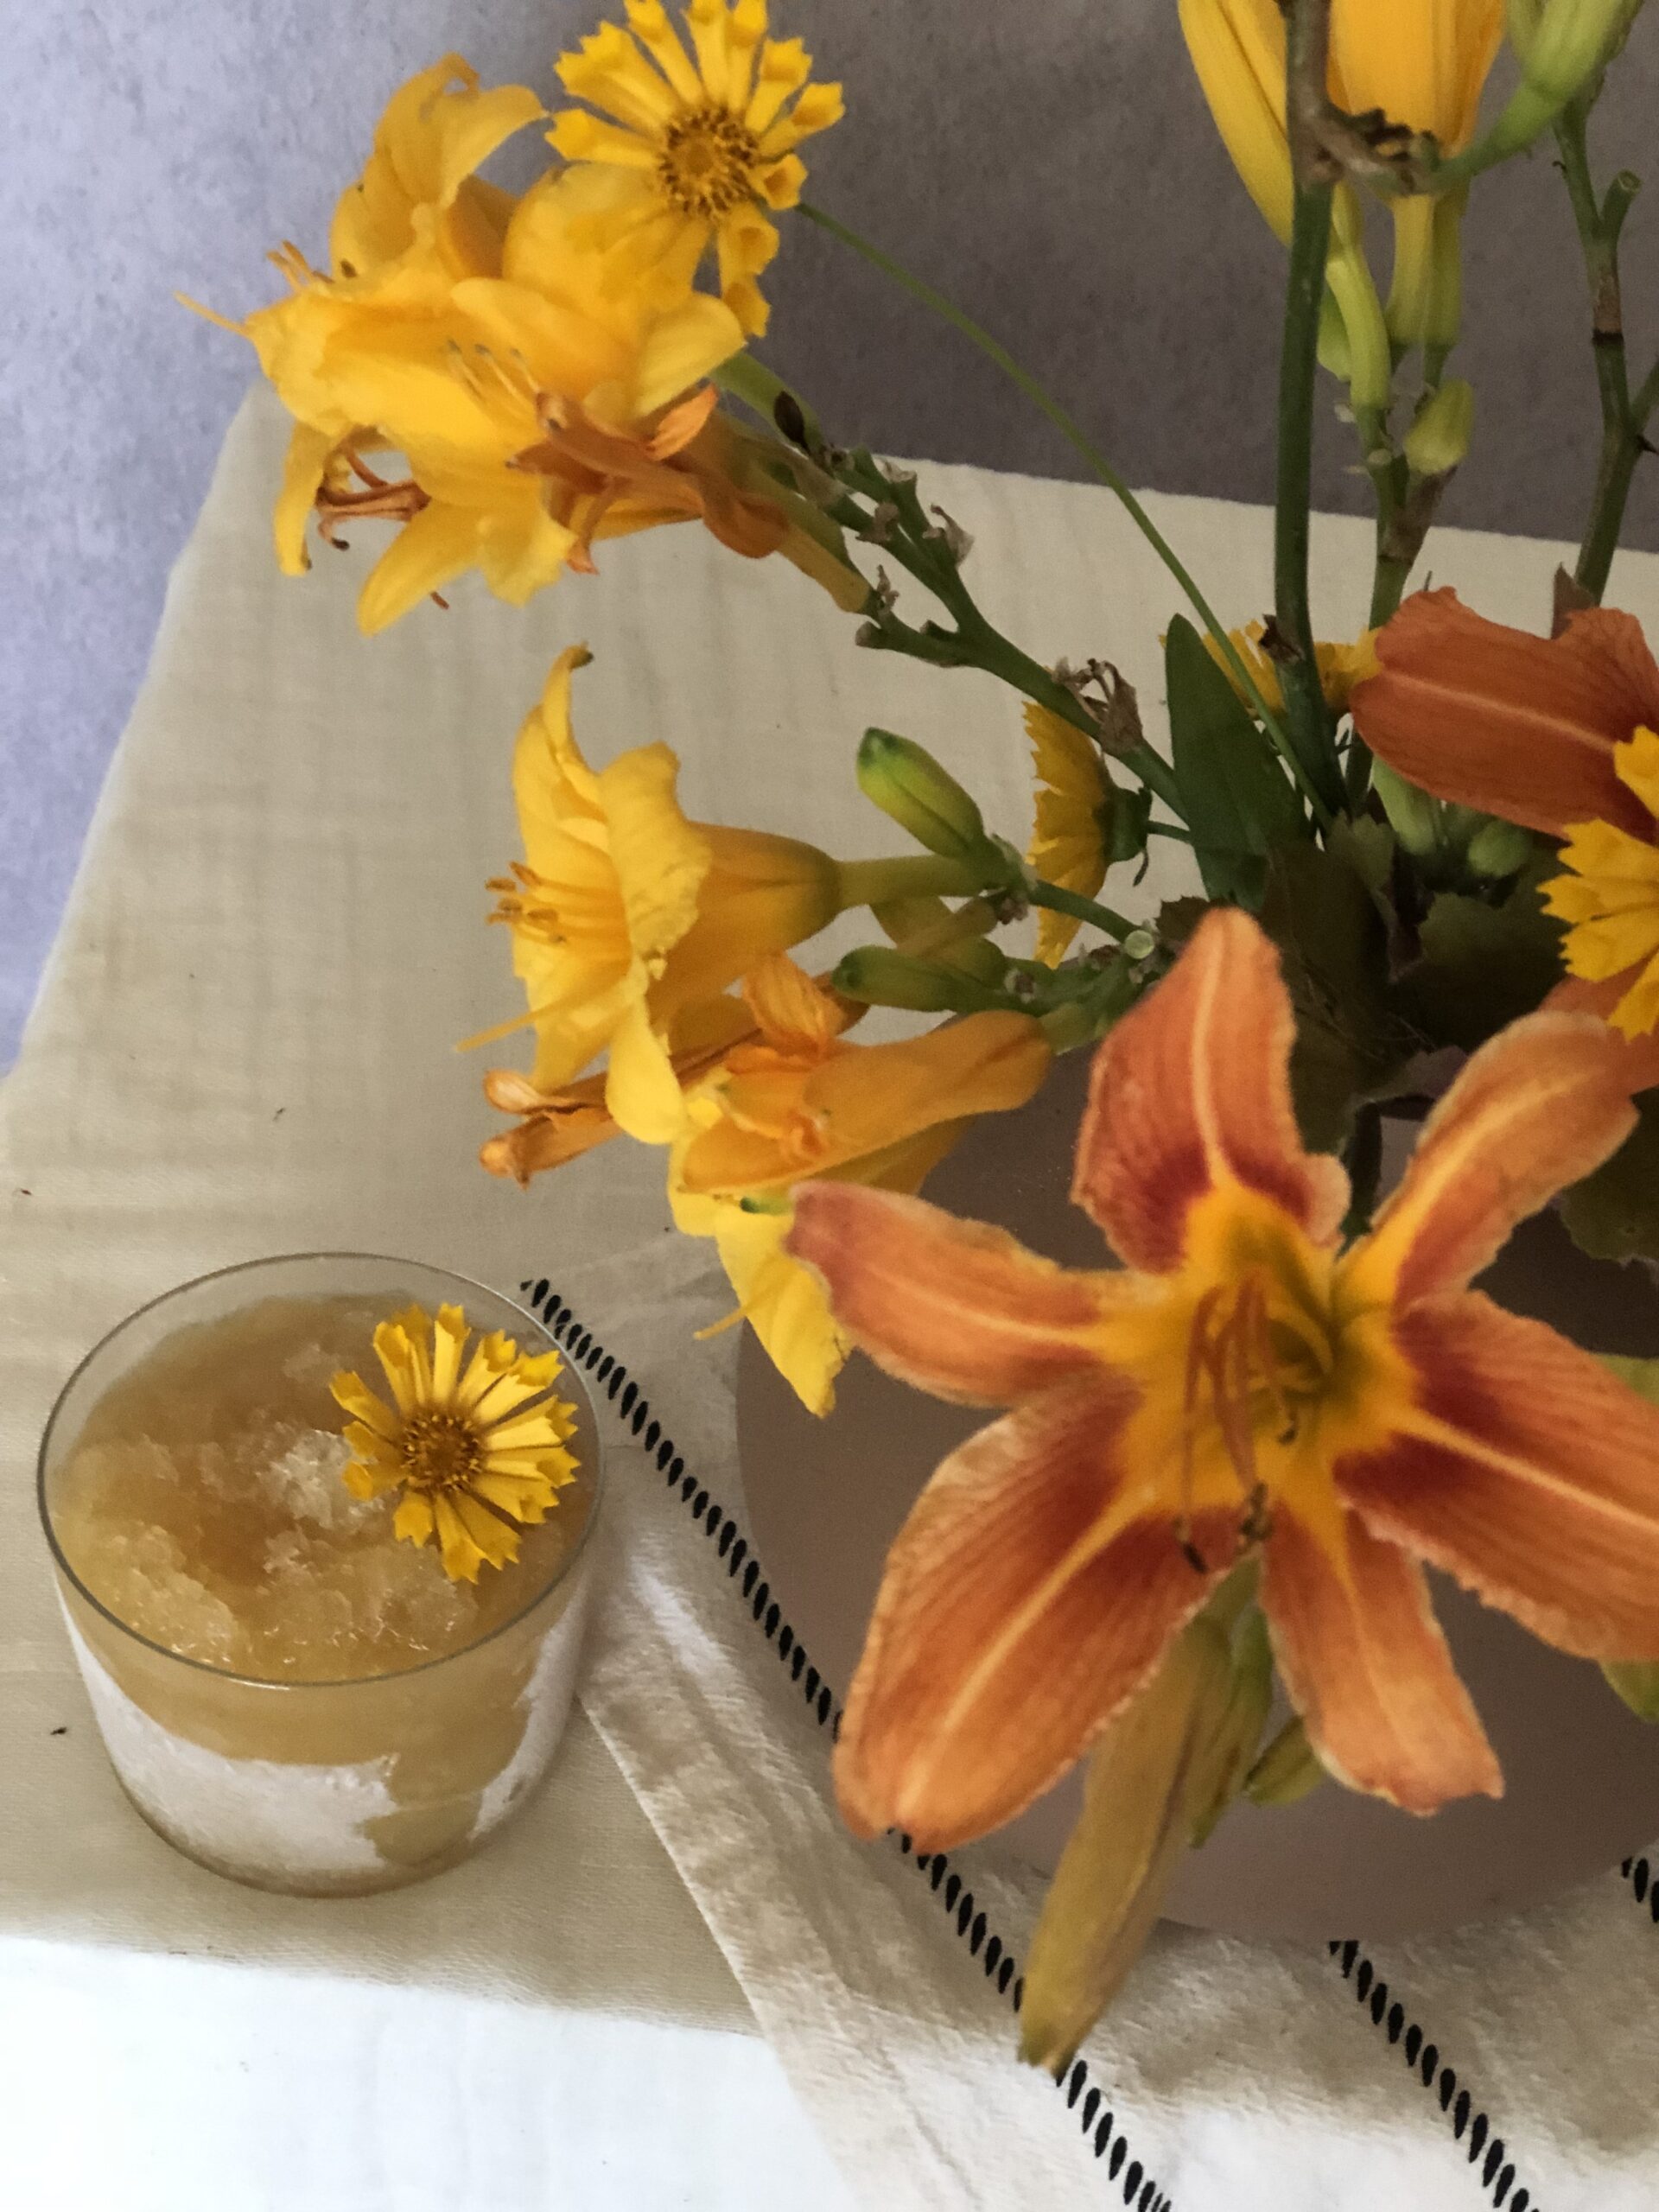
If colorful orange and yellow is what you are looking for in your garden, then these flowering lily plants are a great option. Easy to maintain, while blooming life isn’t the longest – they are still fun to have growing. Sometimes you can even find these lilies growing wild, so keep your eye out for them!
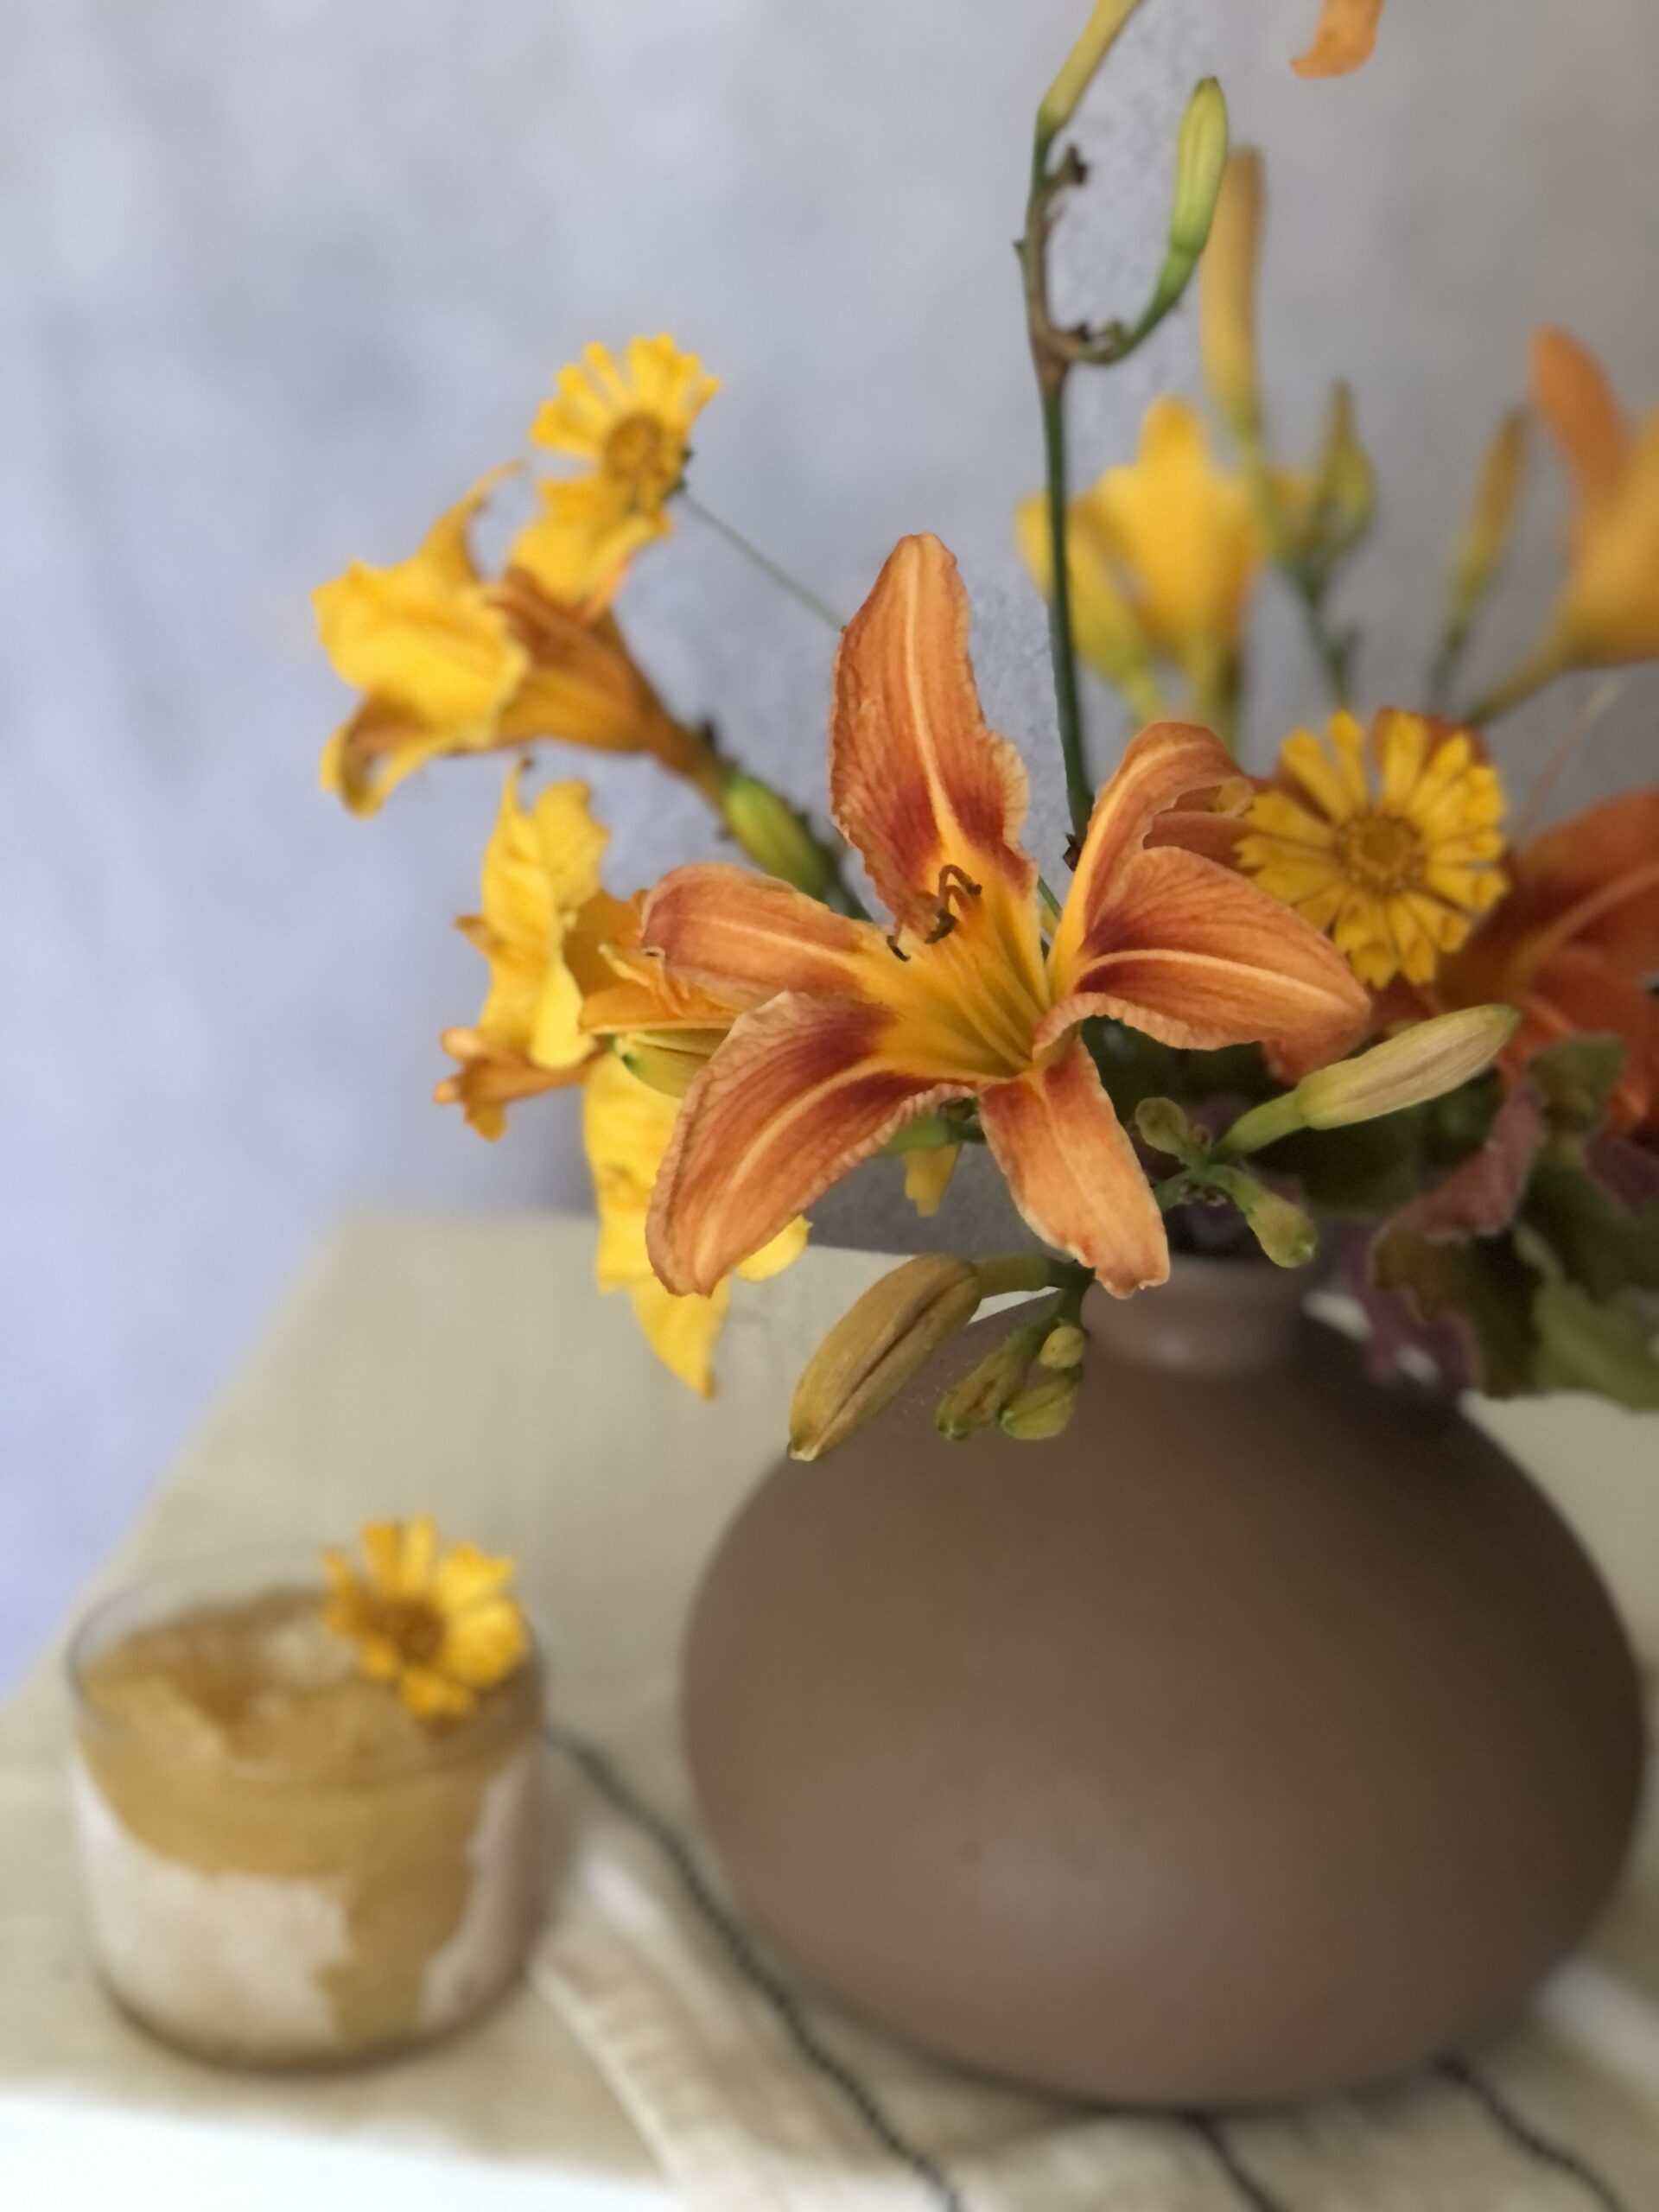
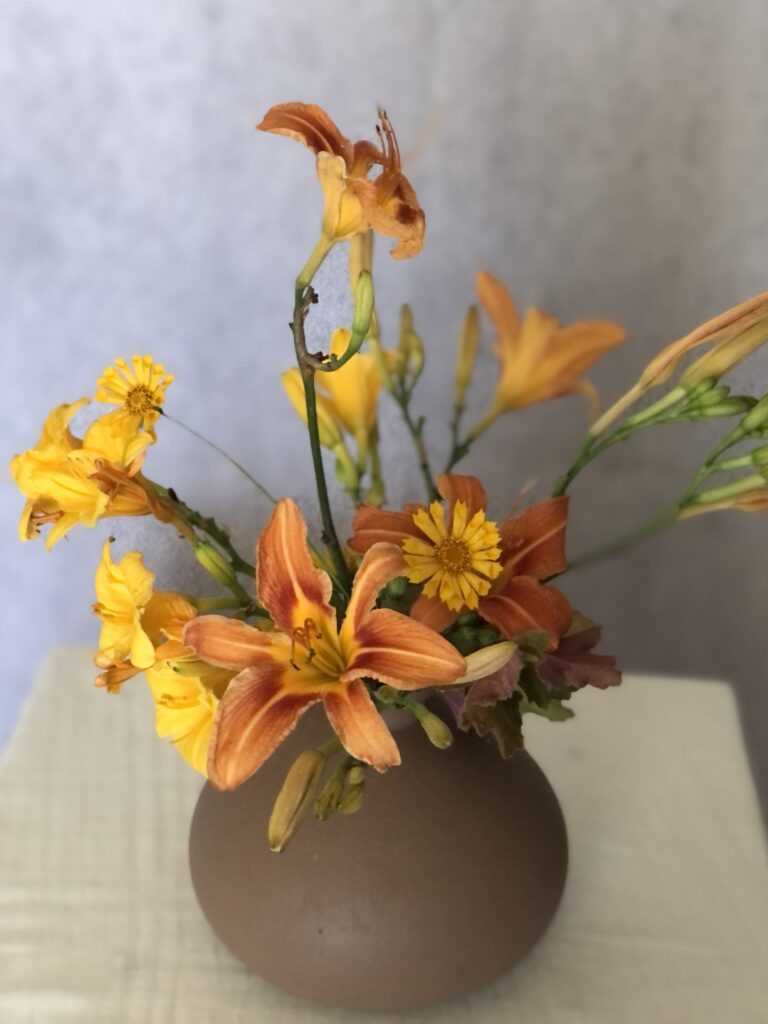
Let’s start off our July flower arrangements with this colorful, bright, and sunny lily design. The orange and yellow lilies are simple day lilies that will bloom each year with proper care. As accent flowers, I picked these cute little daisy flowers and for foliage the heuchera leaves which add great texture and a balancing color.
For arranging, I’m using a fun shaped vase since the flowers are fun too. Since the vase opening is pretty small, I do not need to use tape or any other support to hold the flowers in place. As I start to fill the vase with more stems, the flowers will hold themselves up.
WHAT I USED FOR THIS ARRANGEMENT:
- two types of day lilies in orange and yellow, perennial – not long lasting after cut
- yellow mini daisy variety, perennial – long lasting
- heuchera ‘caramel’ foliage, perennial – long lasting but get in water as soon as cutting (these leaves are one of my favorite types of foliage as the color will shift throughout the season – I love that and they have great texture)
- smaller, fun sized vase
WHAT I’M DRINKING: summer slush with bourbon. It’s so easy to make, keep in the freezer, and enjoy whenever you want an icy treat. Here’s how to make it: in a large freezer proof bowl with lid add one can each orange juice / lemonade concentrate that has be defrosted. Add 2 cups sweet tea. Add 7 cups water. Add as much bourbon as you like – I do a whole bottle. Place in the freezer until slushy. If you want to make this more liquid (not eat with a spoon), add some lemon lime soda to top off once you scoop the drink into your cup – do not add the soda to the whole batch. This slush is great for a crowd as it makes a lot of servings. Enjoy!
DESIGN TIPS FOR THIS ARRANGEMENT:
- I like to group my colors together, so I’ll put the orange lilies closer together then the yellow flowers closer together and fill in the gaps with the foliage
- place your thicker stem flowers (lilies) in first then finish off with the more delicate stems as to not bend them and to help hold them into place
Enjoy arranging with your colorful flowers and sipping on a summer slush! For the video of both, check out IG reels @ oliveandgene
JULY ARRANGEMENTS – IN PINK!
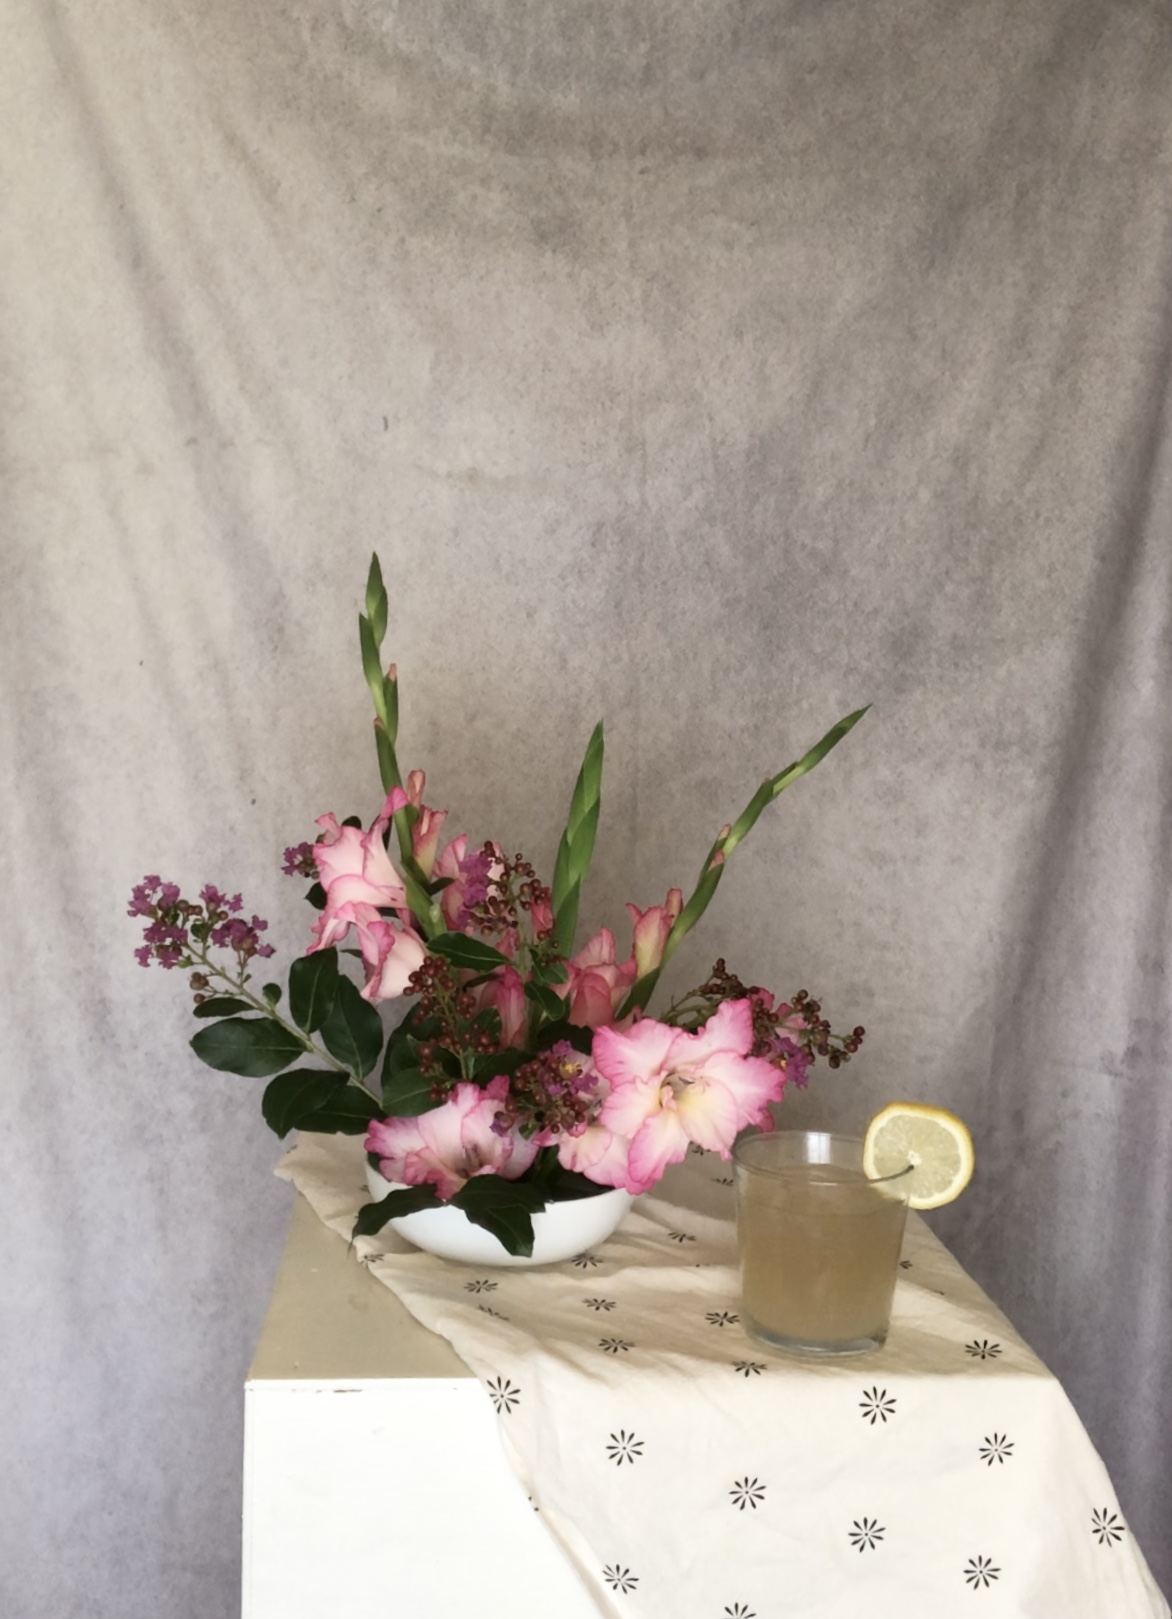
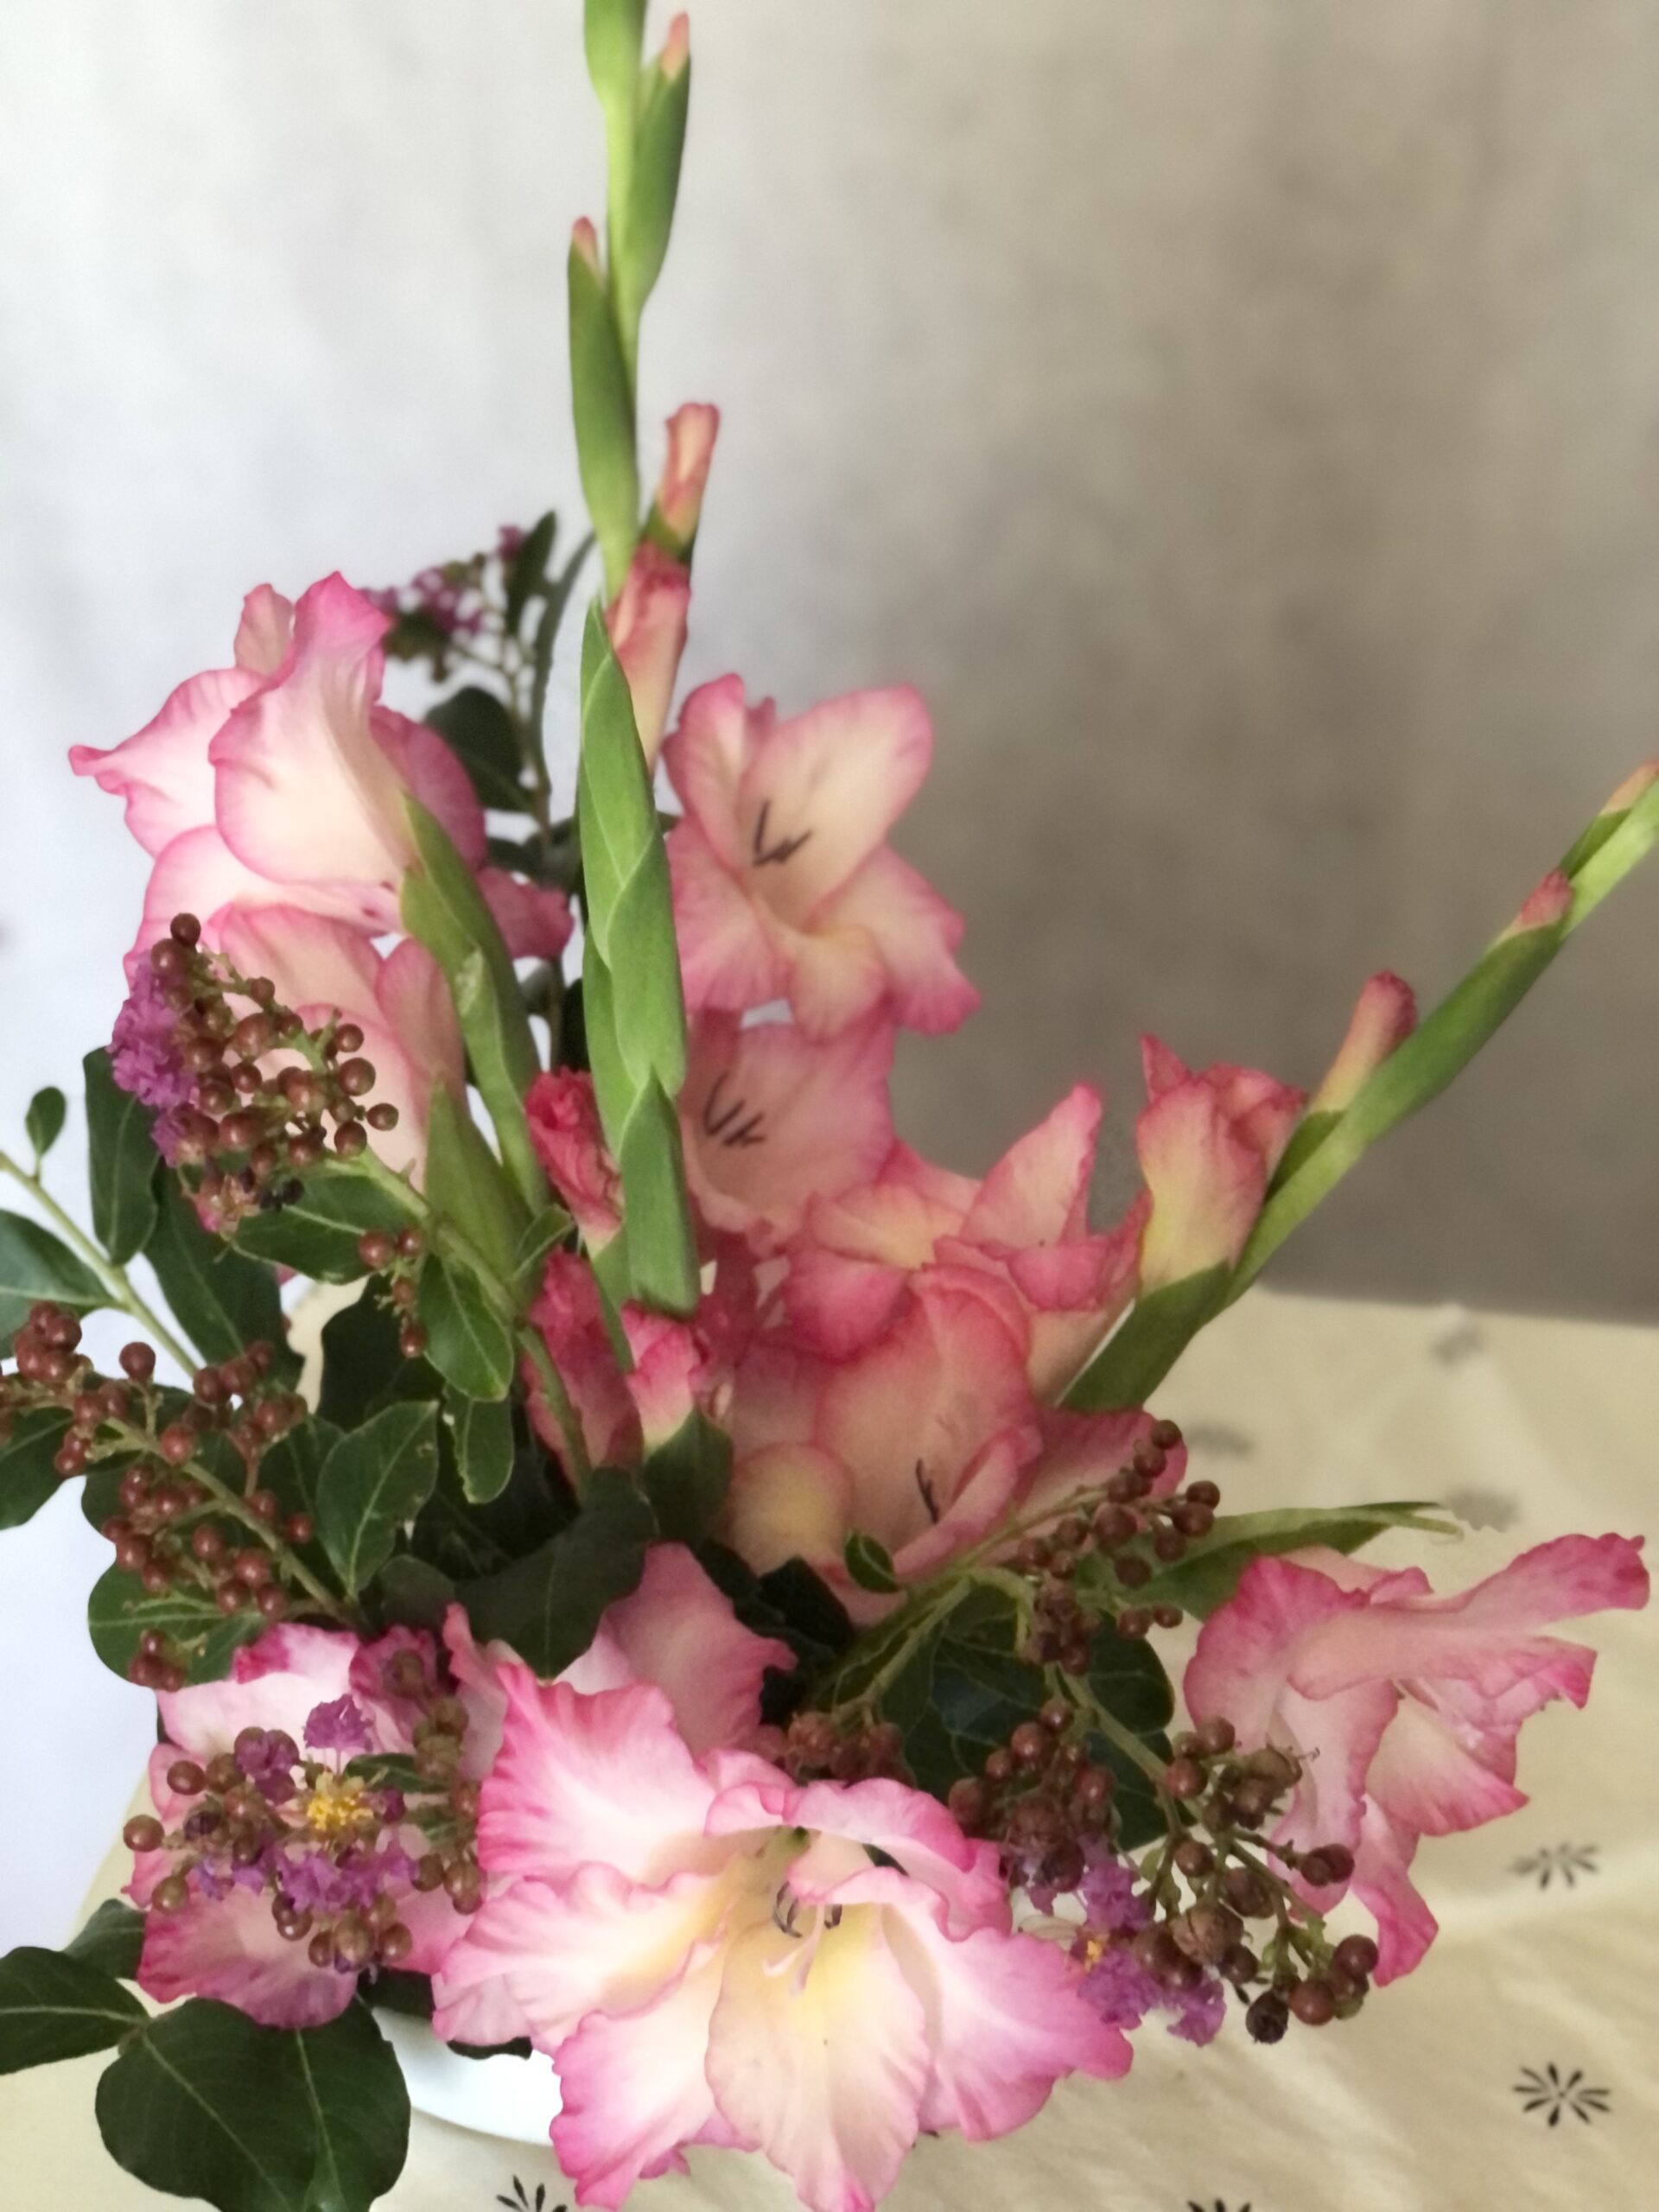
THE PINK GLADIOLUS ARRANGEMENT
For the remainder of the month of July, we are going to be using all pink flowers and ‘building’ on an arrangement. First we will start with gladiolus, then moving on to hydrangea, and finishing up with zinnia. Let’s start cutting and arranging!
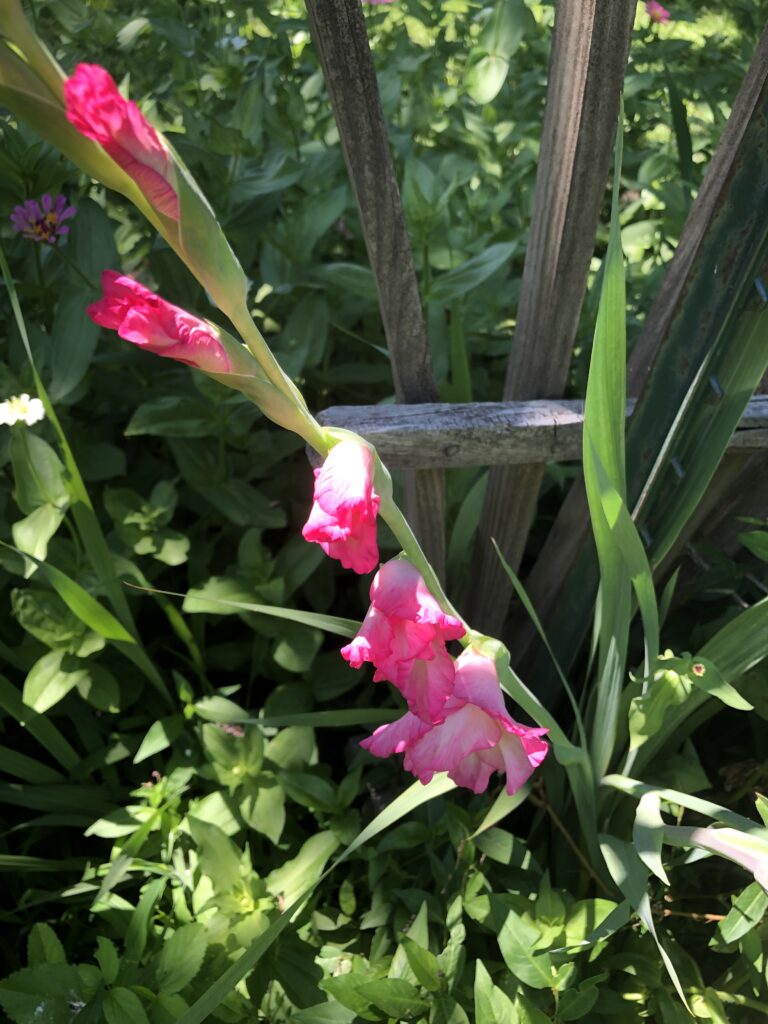
gladiolus – if growing: provide a support structure as plants grow tall / can fall over. if picking: cut as soon as lower flowers bloom / top flowers will open later
Gladiolus are a semi new flower to my garden, with this being my second growing season. Last year I purchased a mixed color pack of 10 bulbs because I wasn’t sure how well they would grow. I will typically do this when starting a new variety – only buy one pack. The reason I do this is first because I don’t know how well the plant will take in my garden, and the second is because I can gather the bulbs in the fall to save for the next season without purchasing new.
These grew amazing both years and this year I didn’t have to spend any money buying new bulbs! I love how these bloom – starting at the bottom with beautiful flowers and blooming up. Gladiolus have a long cut vase life because of this. Once the lower blooms are finished, the tops will be opening. Pretty flowers for a longer time period is always a winner in my book.
This arrangement has only 2 products – gladiolus and the foliage, myrtle plant. What I love about the gladiolus is how many blooms they produce. From one stem, you can cut in half or even thirds – resulting in more bloom stems to fill your vase. I am using a bowl shaped vase with a flower frog (you can read all about flower frogs above).
WHAT I USED FOR THIS ARRANGEMENT:
- 3 stems of pink gladiolus, annual (you can dig up the bulbs in fall to save for the following year) – long lasting vase life
- crepe-myrtle foliage / greenery in bloom, perennial plant – long lasting vase life
- low vase with flower frog
WHAT I’M DRINKING: Arnold Palmer, equal parts tea and lemonade – sweeten to liking. A summer favorite!!
DESIGN TIPS FOR THIS ARRANGEMENT
- since the gladiolus have a tall stem, cut in half to make it easy to mange when arranging
- place the gladiolus in the frog first, then add greenery to fill in
- add stems in at all angles – not all blooms facing the same direction
Check out the full design video on IG!
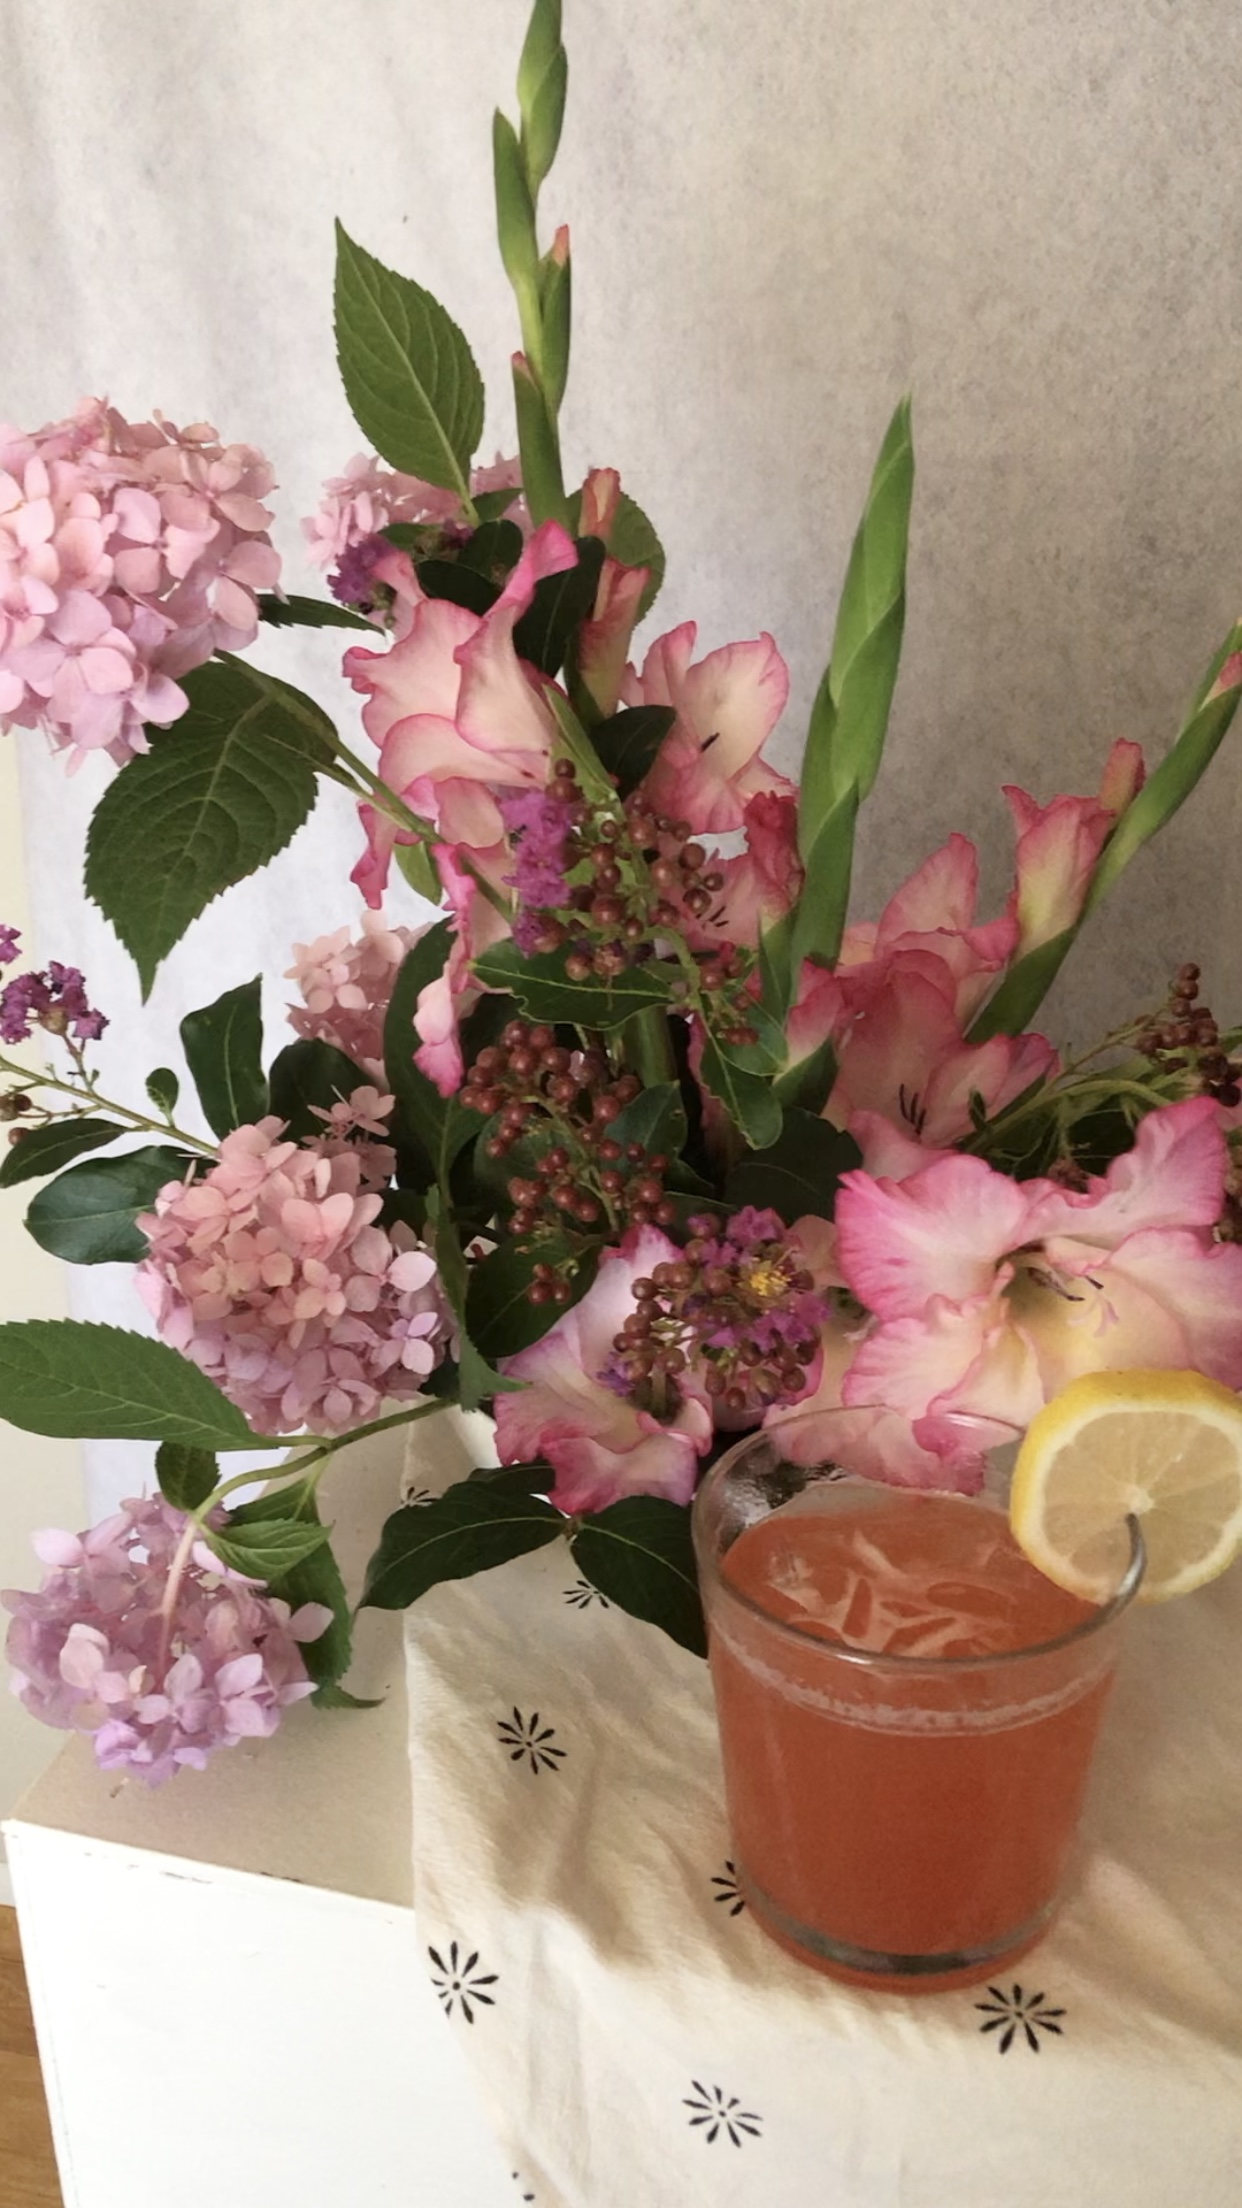
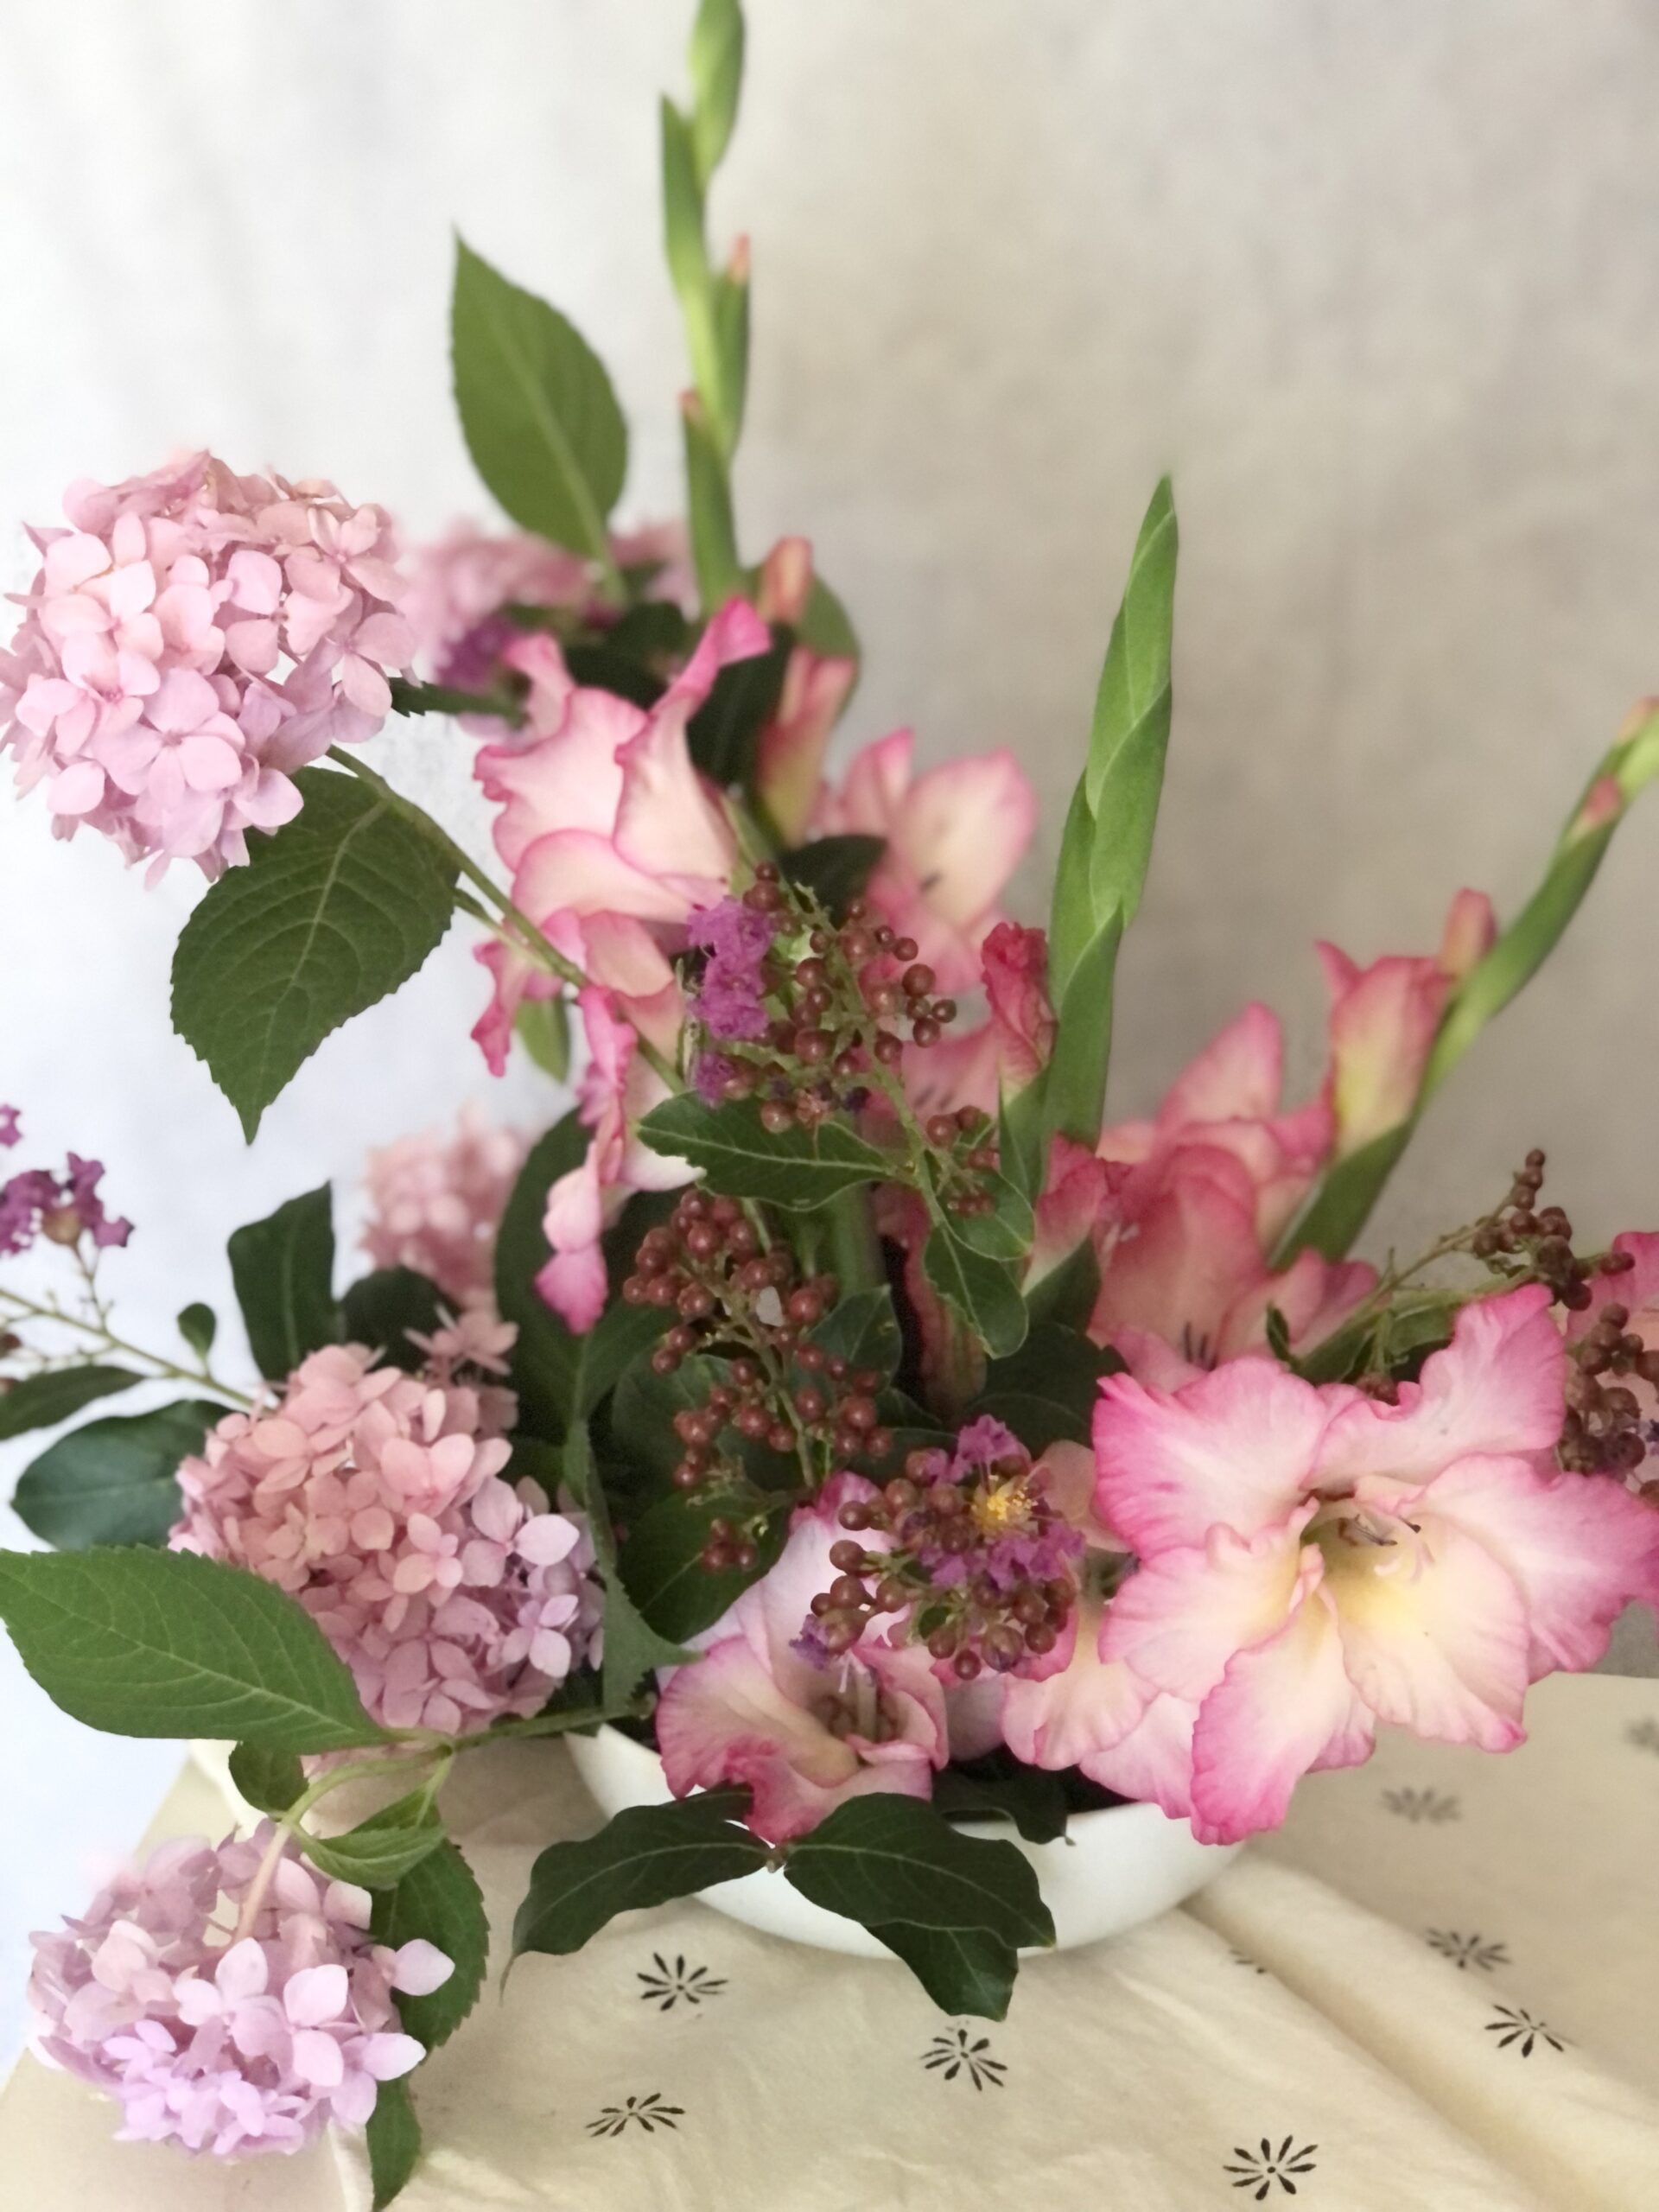
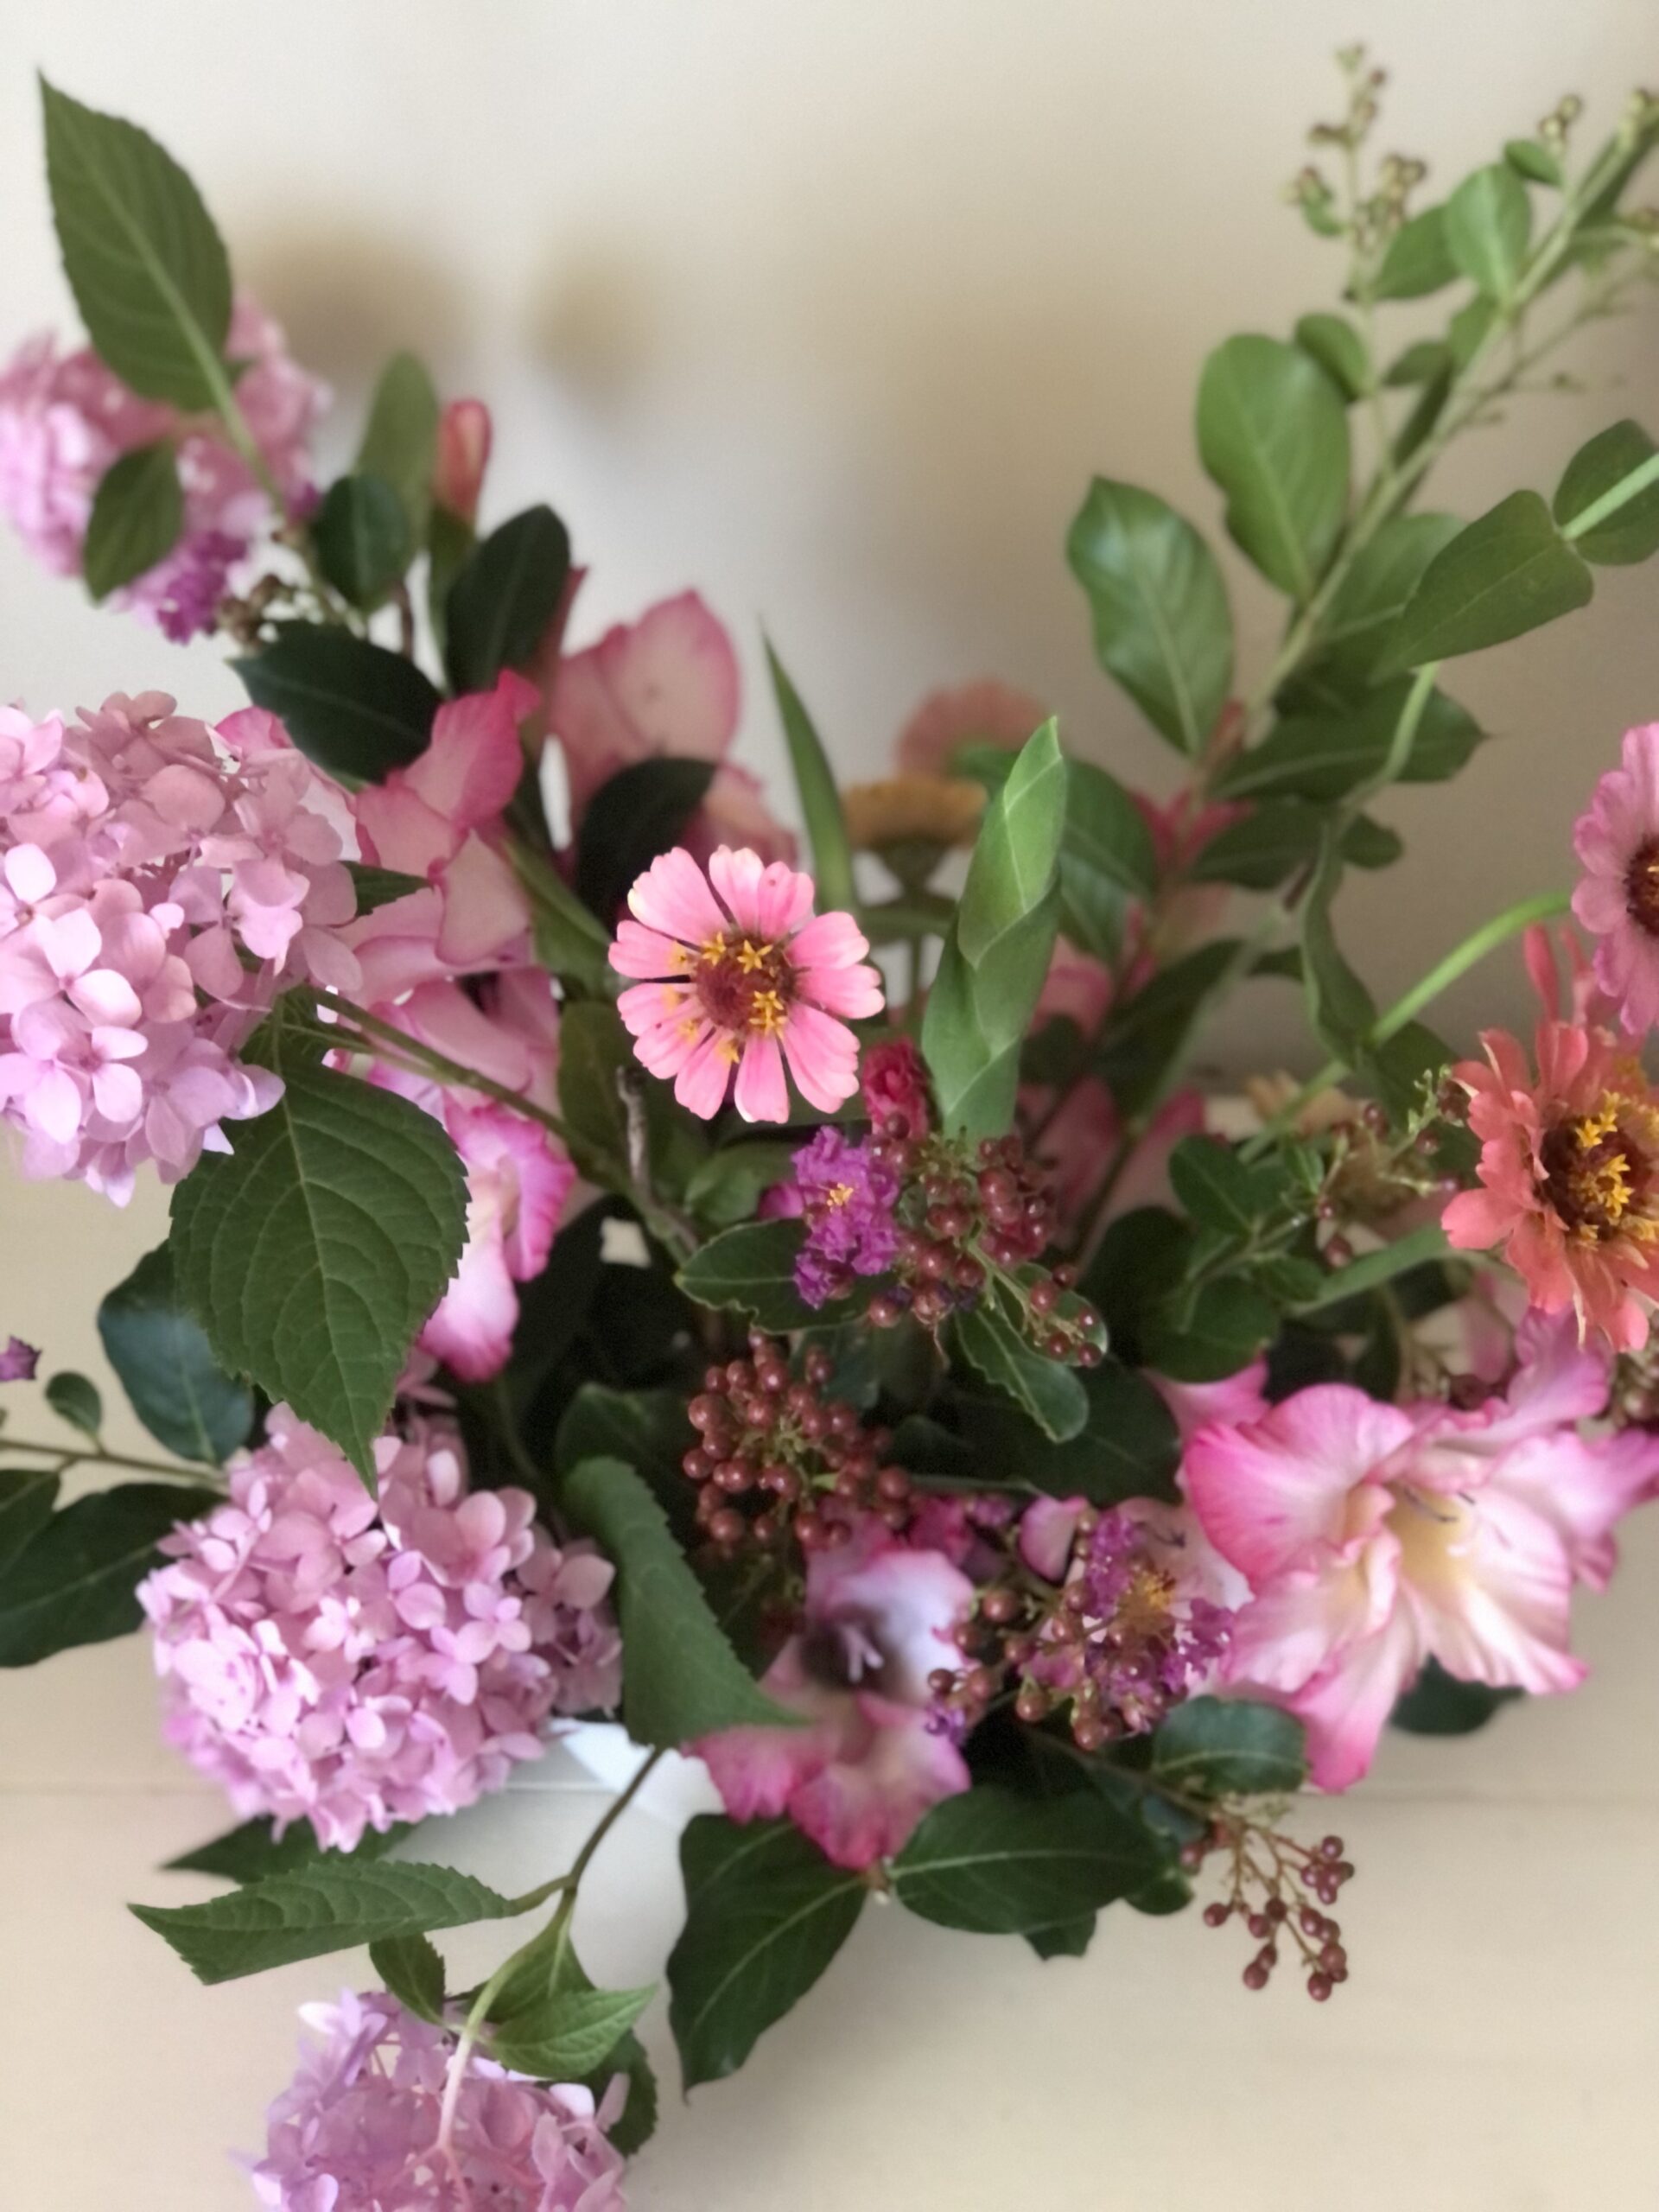
the pink july arrangement continued
This week we are adding on to our pink gladiolus arrangement with pink hydrangea. These pink hydrangea are my favorite addition with a beautiful, soft, romantic look and feel. Let’s start!

hydrangea – if growing: they do not require much attention just water as needed. if picking: remove most of the stem greenery only keeping a few at the top.
I have a couple different varieties of hydrangea planted (you saw the white hydrangea from earlier), now here are the pink. These pink hydrangea have much smaller bloom sized heads which are great for incorporating into mixed flower arrangements.
I’m adding around 5 stems of the pink hydrangea into my already started gladiolus arrangement.
WHAT I USED FOR THIS ARRANGEMENT:
- the already started arrangement (I designed this whole arrangement on the same day, I did not wait a week in between – the flowers would not last that long)
- pink hydrangea, perennial – semi long lasting cut vase life
WHAT I’M DRINKING: the Arnold Palmer with added ‘pink’ strawberry puree. I love making strawberry puree to add to so many different recipes. This blog post has my instructions on how I make the puree. I add 1-2 tablespoons and mix. Very refreshing during the summer months!
DESIGN TIPS FOR THIS ARRANGEMENT
- as you can see if you watch the reel video – I place a stem in but when I step back to look at the arrangement as a whole, I don’t like the placement of one hydrangea bloom so I just cut it out and place it elsewhere (don’t feel like you can’t move things around)
- since this is a mixed flower arrangement, I will semi group my flowers together – keeping the hydrangea to mostly one side of the vase
- angle the stems into your flower frog at all different points on the same side of your vase (keep some low – others higher)
Catch the video reel over on IG at oliveandgene. Coming up next week is the final addition to this July pink arrangement. Any guesses what pink flower I’ll be adding?!
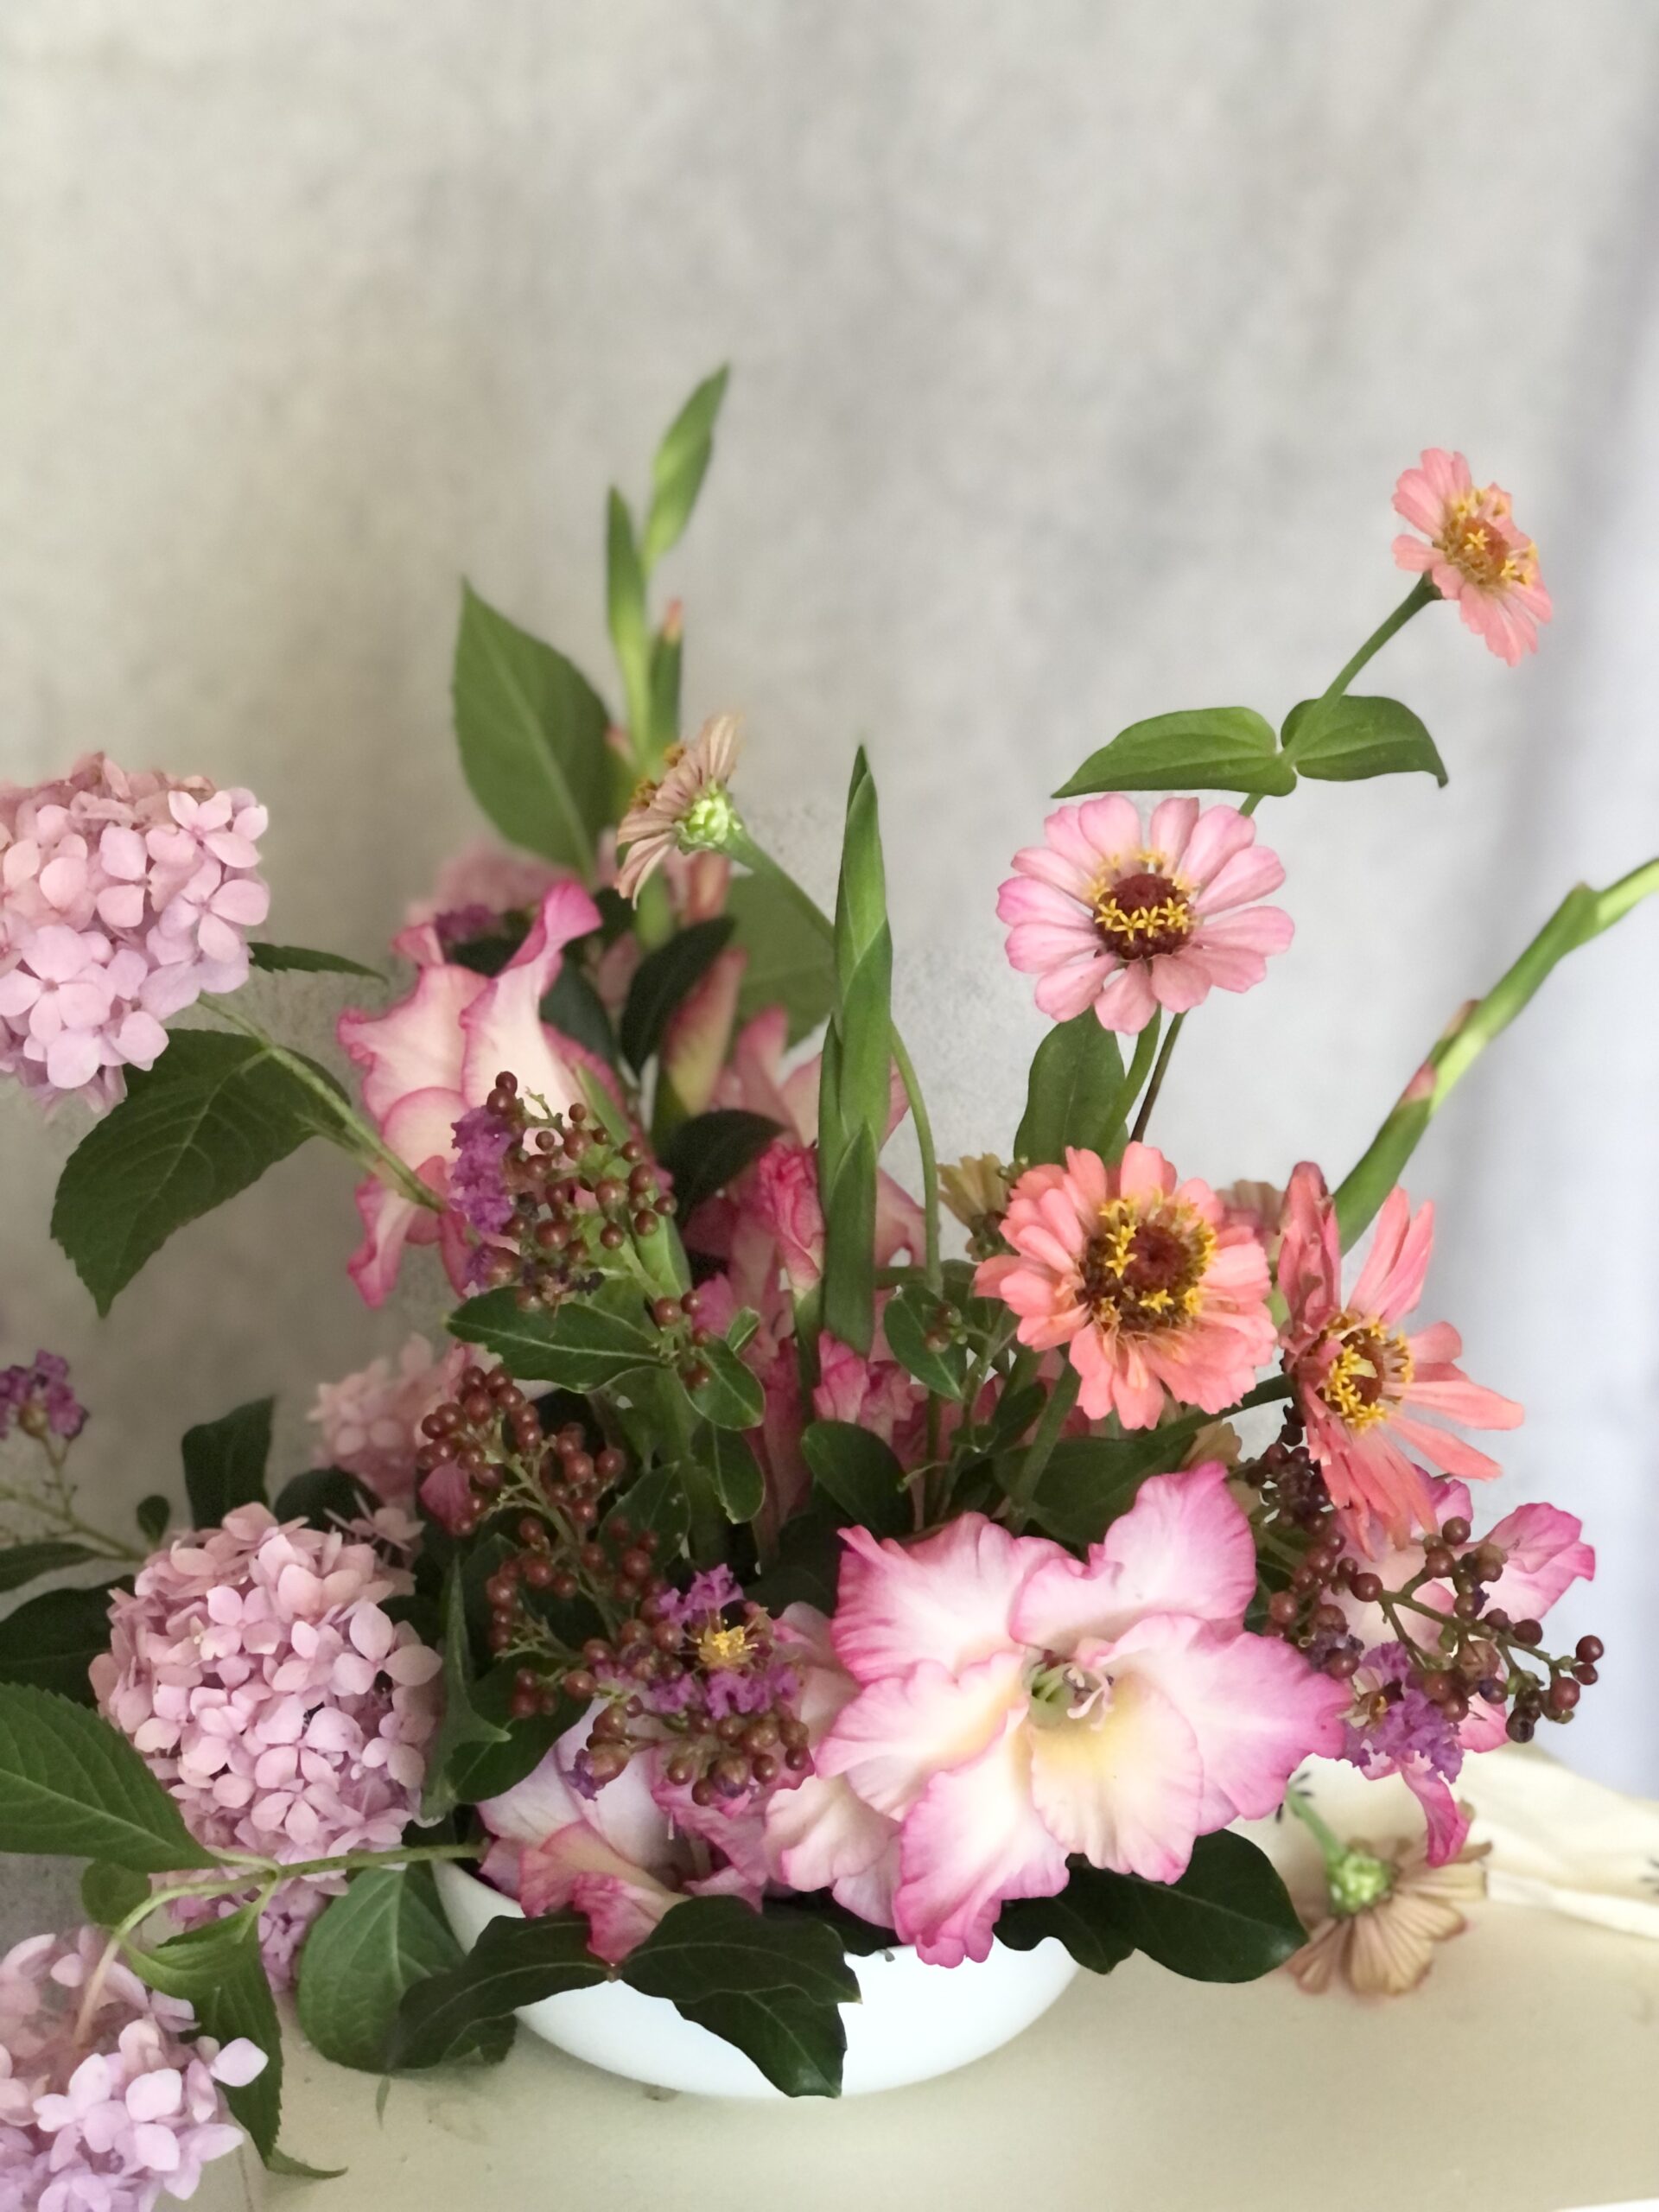
the pink july arrangement final design
As we wrap up the month of July with our pink flowers, our final addition will be the zinnia. I love zinnia flowers for so many reasons! Keep scrolling to read all about them.
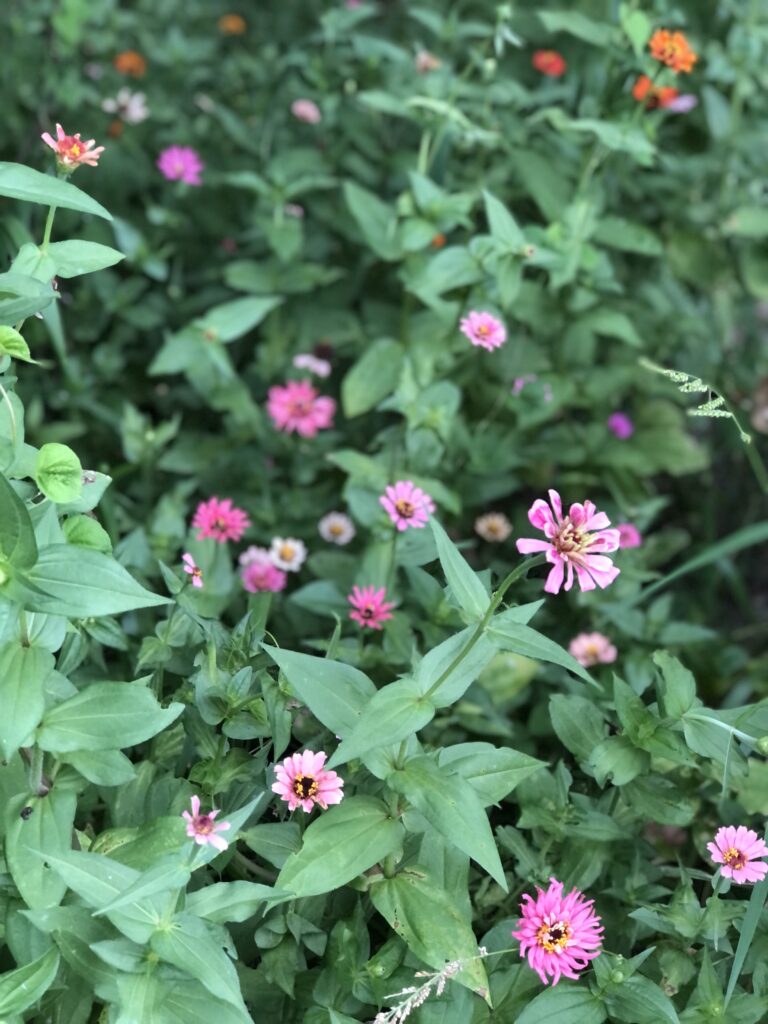
zinnia – if growing: easy to grow with little maintenance. if picking: be careful of stems which can bend easily
There are so many things I love about zinnia flowers – easy to grow, long cut vase life, many different colors / varieties to pick from, and the list goes on. They are a seed flower that you have to plant each year, but if you save your dried flower head with the seeds at the end of the season – you can plant those seeds in the spring. When the flowers start to get all dried looking, don’t throw them away. Let them dry out fully, then keep in a bag for next spring. When that time comes, I will share with you that process here. But for now, let’s finish up our July pink flower arrangement.
WHAT I USED FOR THIS ARRANGEMENT:
- my arrangement from before with the gladiolus and hydrangea
- around 8 stems of pink zinnia, annual – long lasting cut vase life
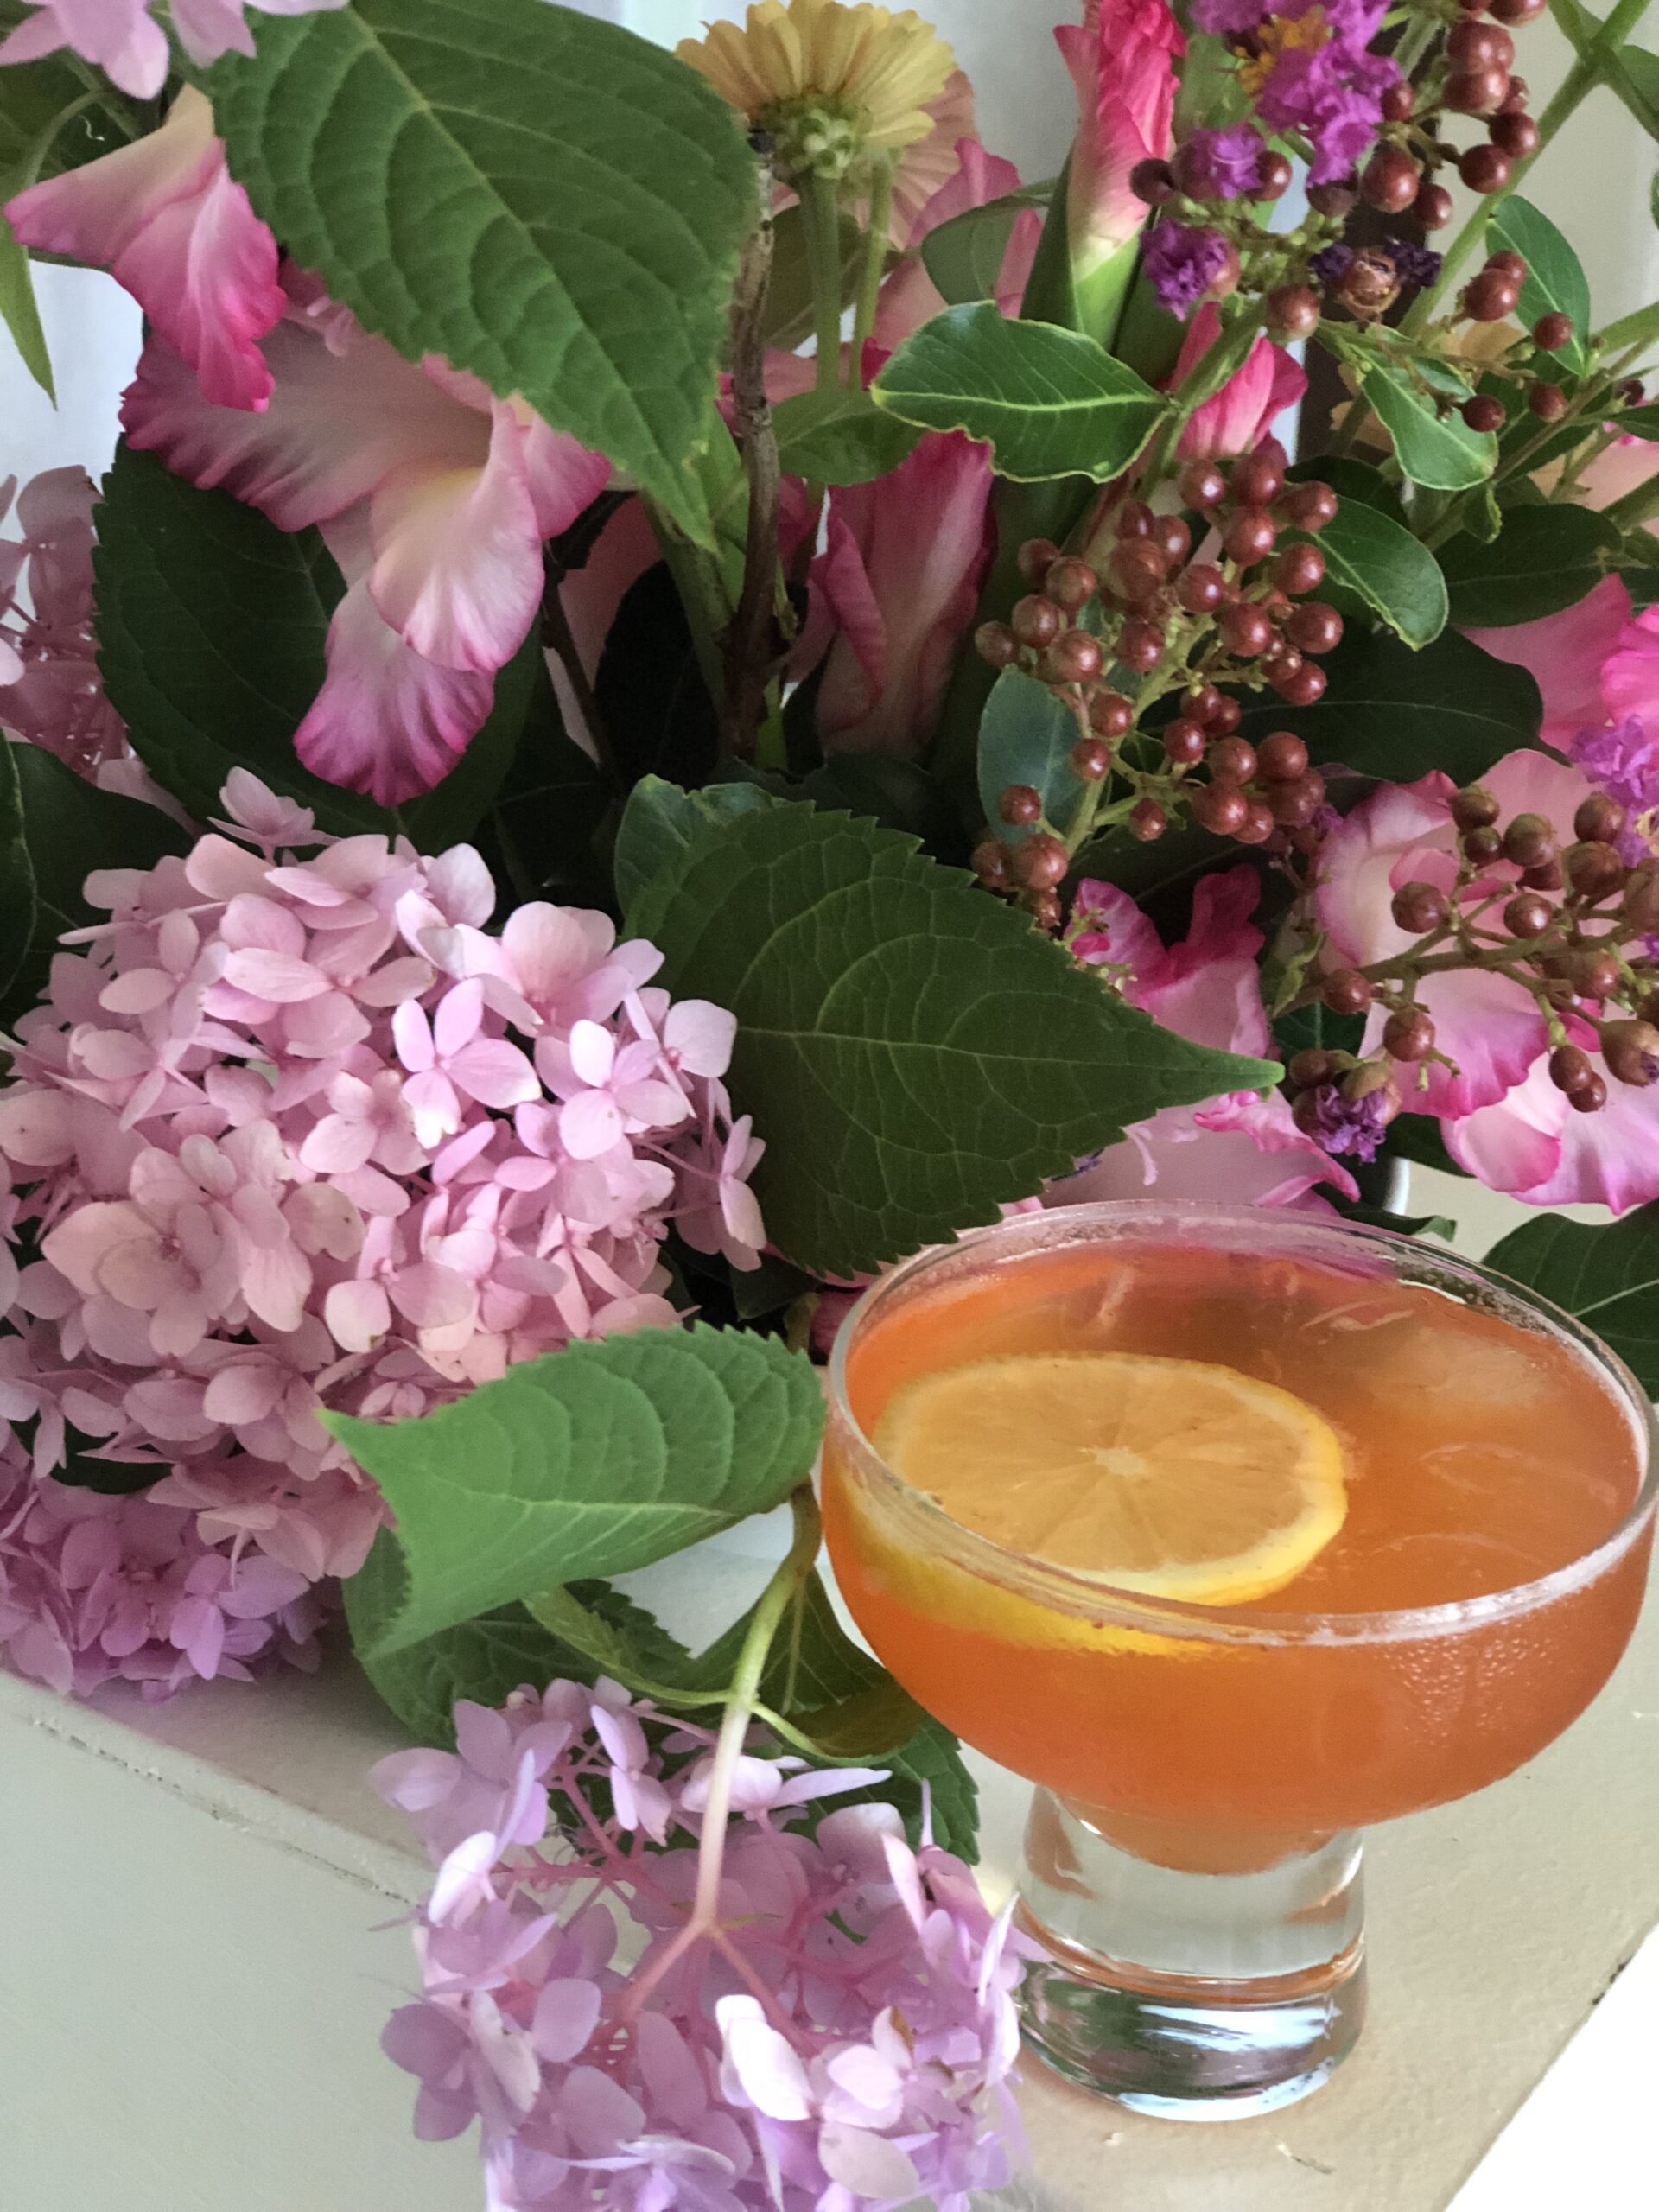
WHAT I’M DRINKING: since this is the final pink July design, I thought – let’s celebrate with adding 1 oz lemoncello liqueur to my strawberry Arnold Palmer! Very tasty!
DESIGN TIPS FOR THIS ARRANGEMENT
- zinnia flowers can have a ‘bendy’ stem, meaning the stem isn’t the strongest which is another reason I picked this flower to add last to the arrangement – the other flowers can help hold the zinnia in place
- don’t worry if your zinnia does fall over or move (mine does – as you can see if you watch the IG reel video) I just let it fall as it will or take it out and replace it in the vase
- zinnia flowers do have a lot of greenery on their stems, so as always remove most of the greenery – I’ll leave 1-3 pieces at the top or if your arrangement is getting too ‘greenery heavy’, remove it all
I hope you’ve enjoyed all the flower arrangements during the month of July. Can you believe we are already on to August?! We still have some really pretty flowers that will be blooming, so can’t wait to share those with you in the coming weeks!
august flowers
THE BEACH INSPIRED FLOWER ARRANGEMENT
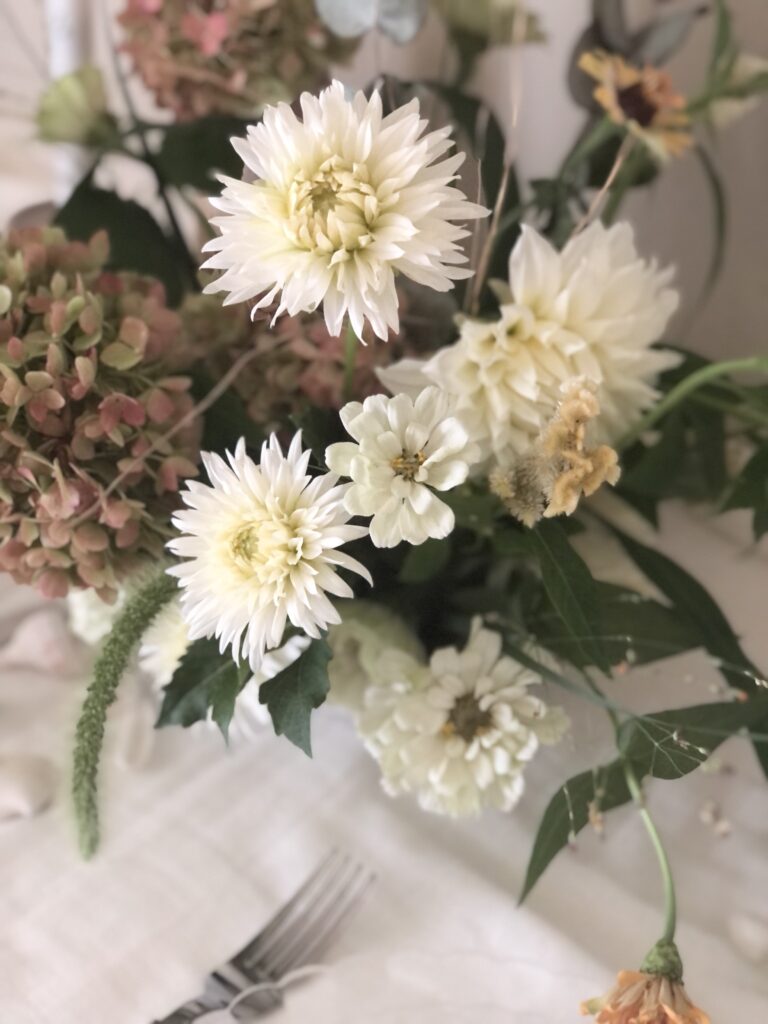
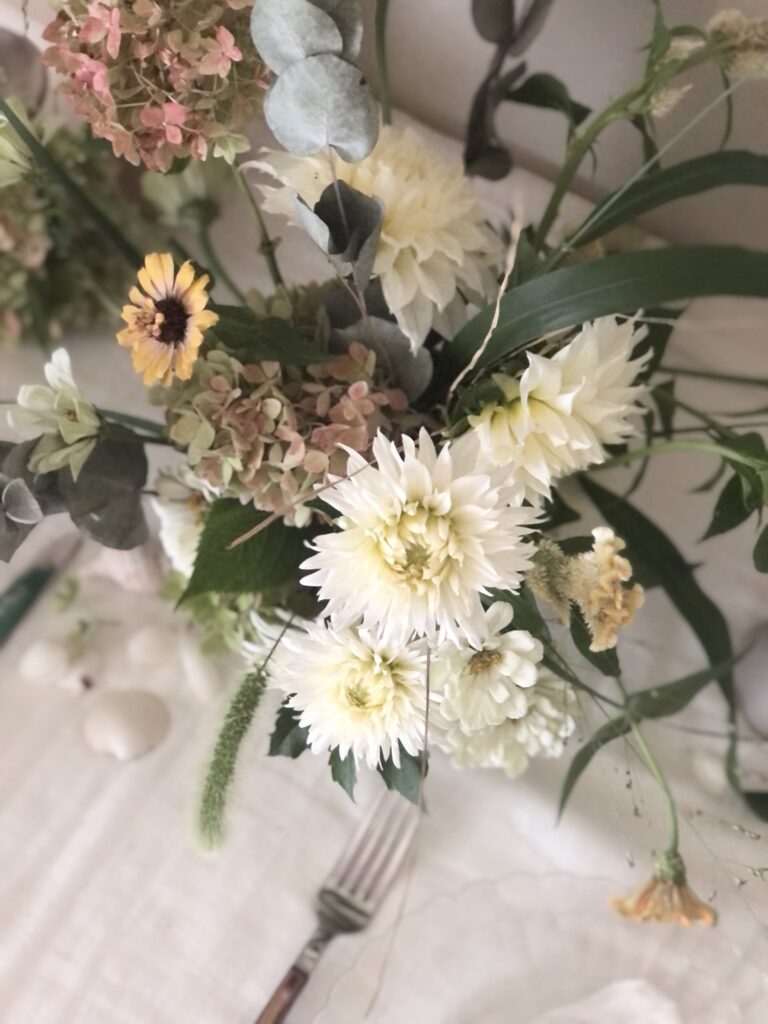
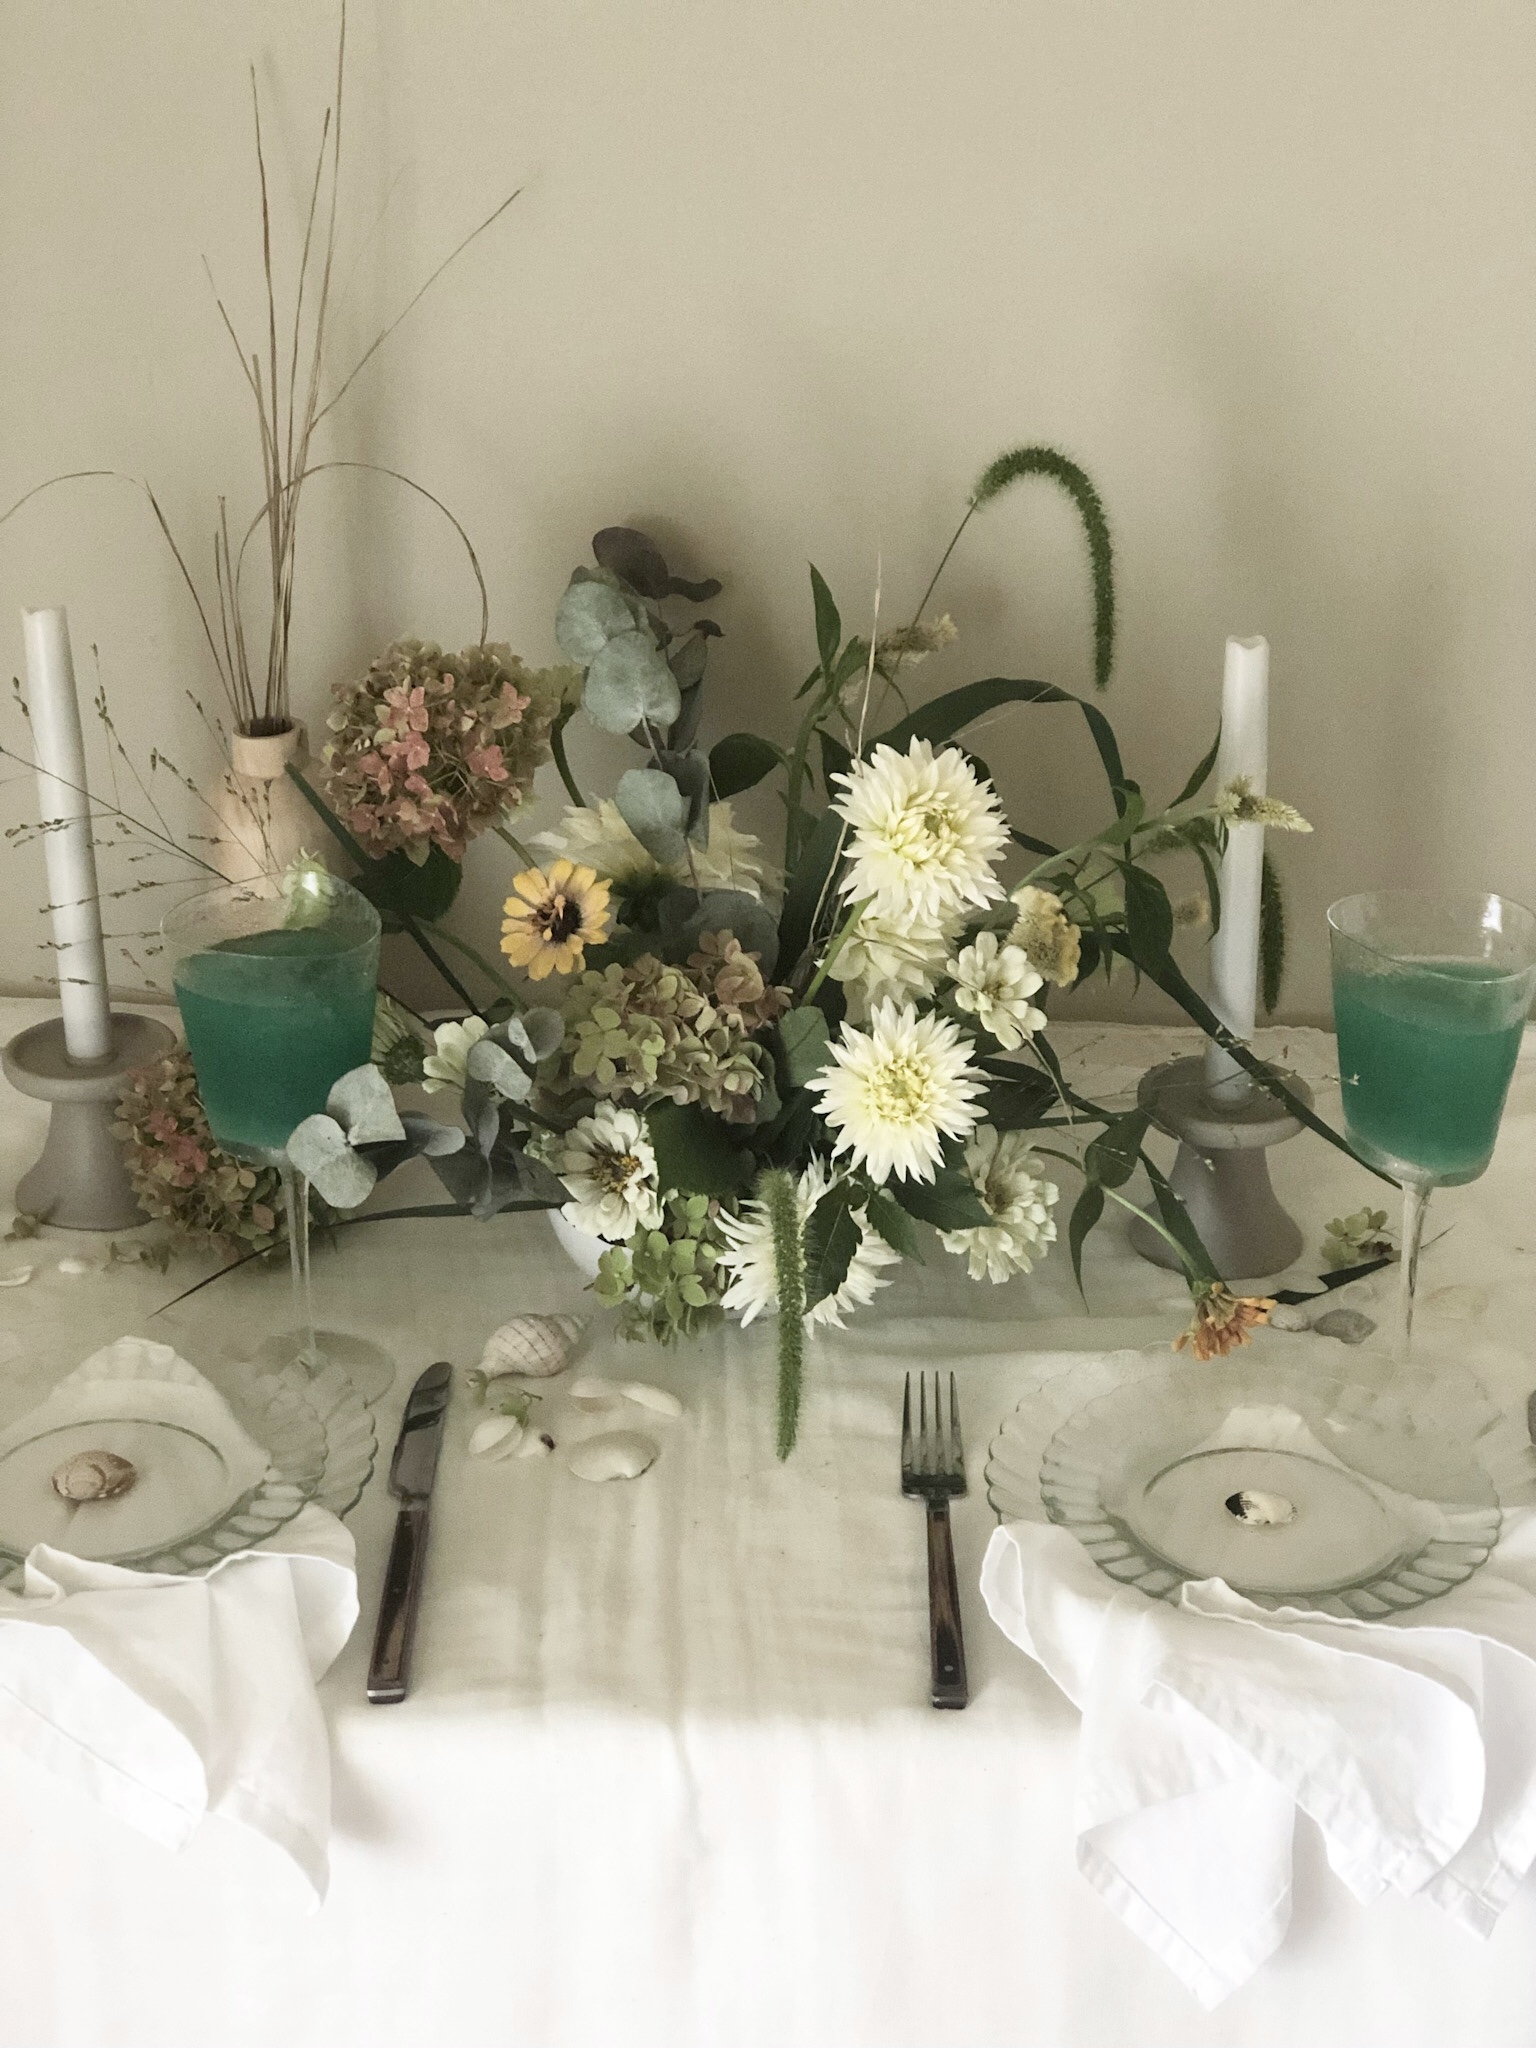
It seems only fitting to try to bring some beach inspiration back to the midwest after my beach vacation last week. I love the white / tan / peach sandy tones as well as all the pretty shades of blue / green that the beach offer. Those were the color tones I was looking for when I went out into the garden to pick. I found some beautiful white dahlias, peach / white zinnias, greenish pink hydrangea, creamy rooster cone, foxtail, and some grasses.
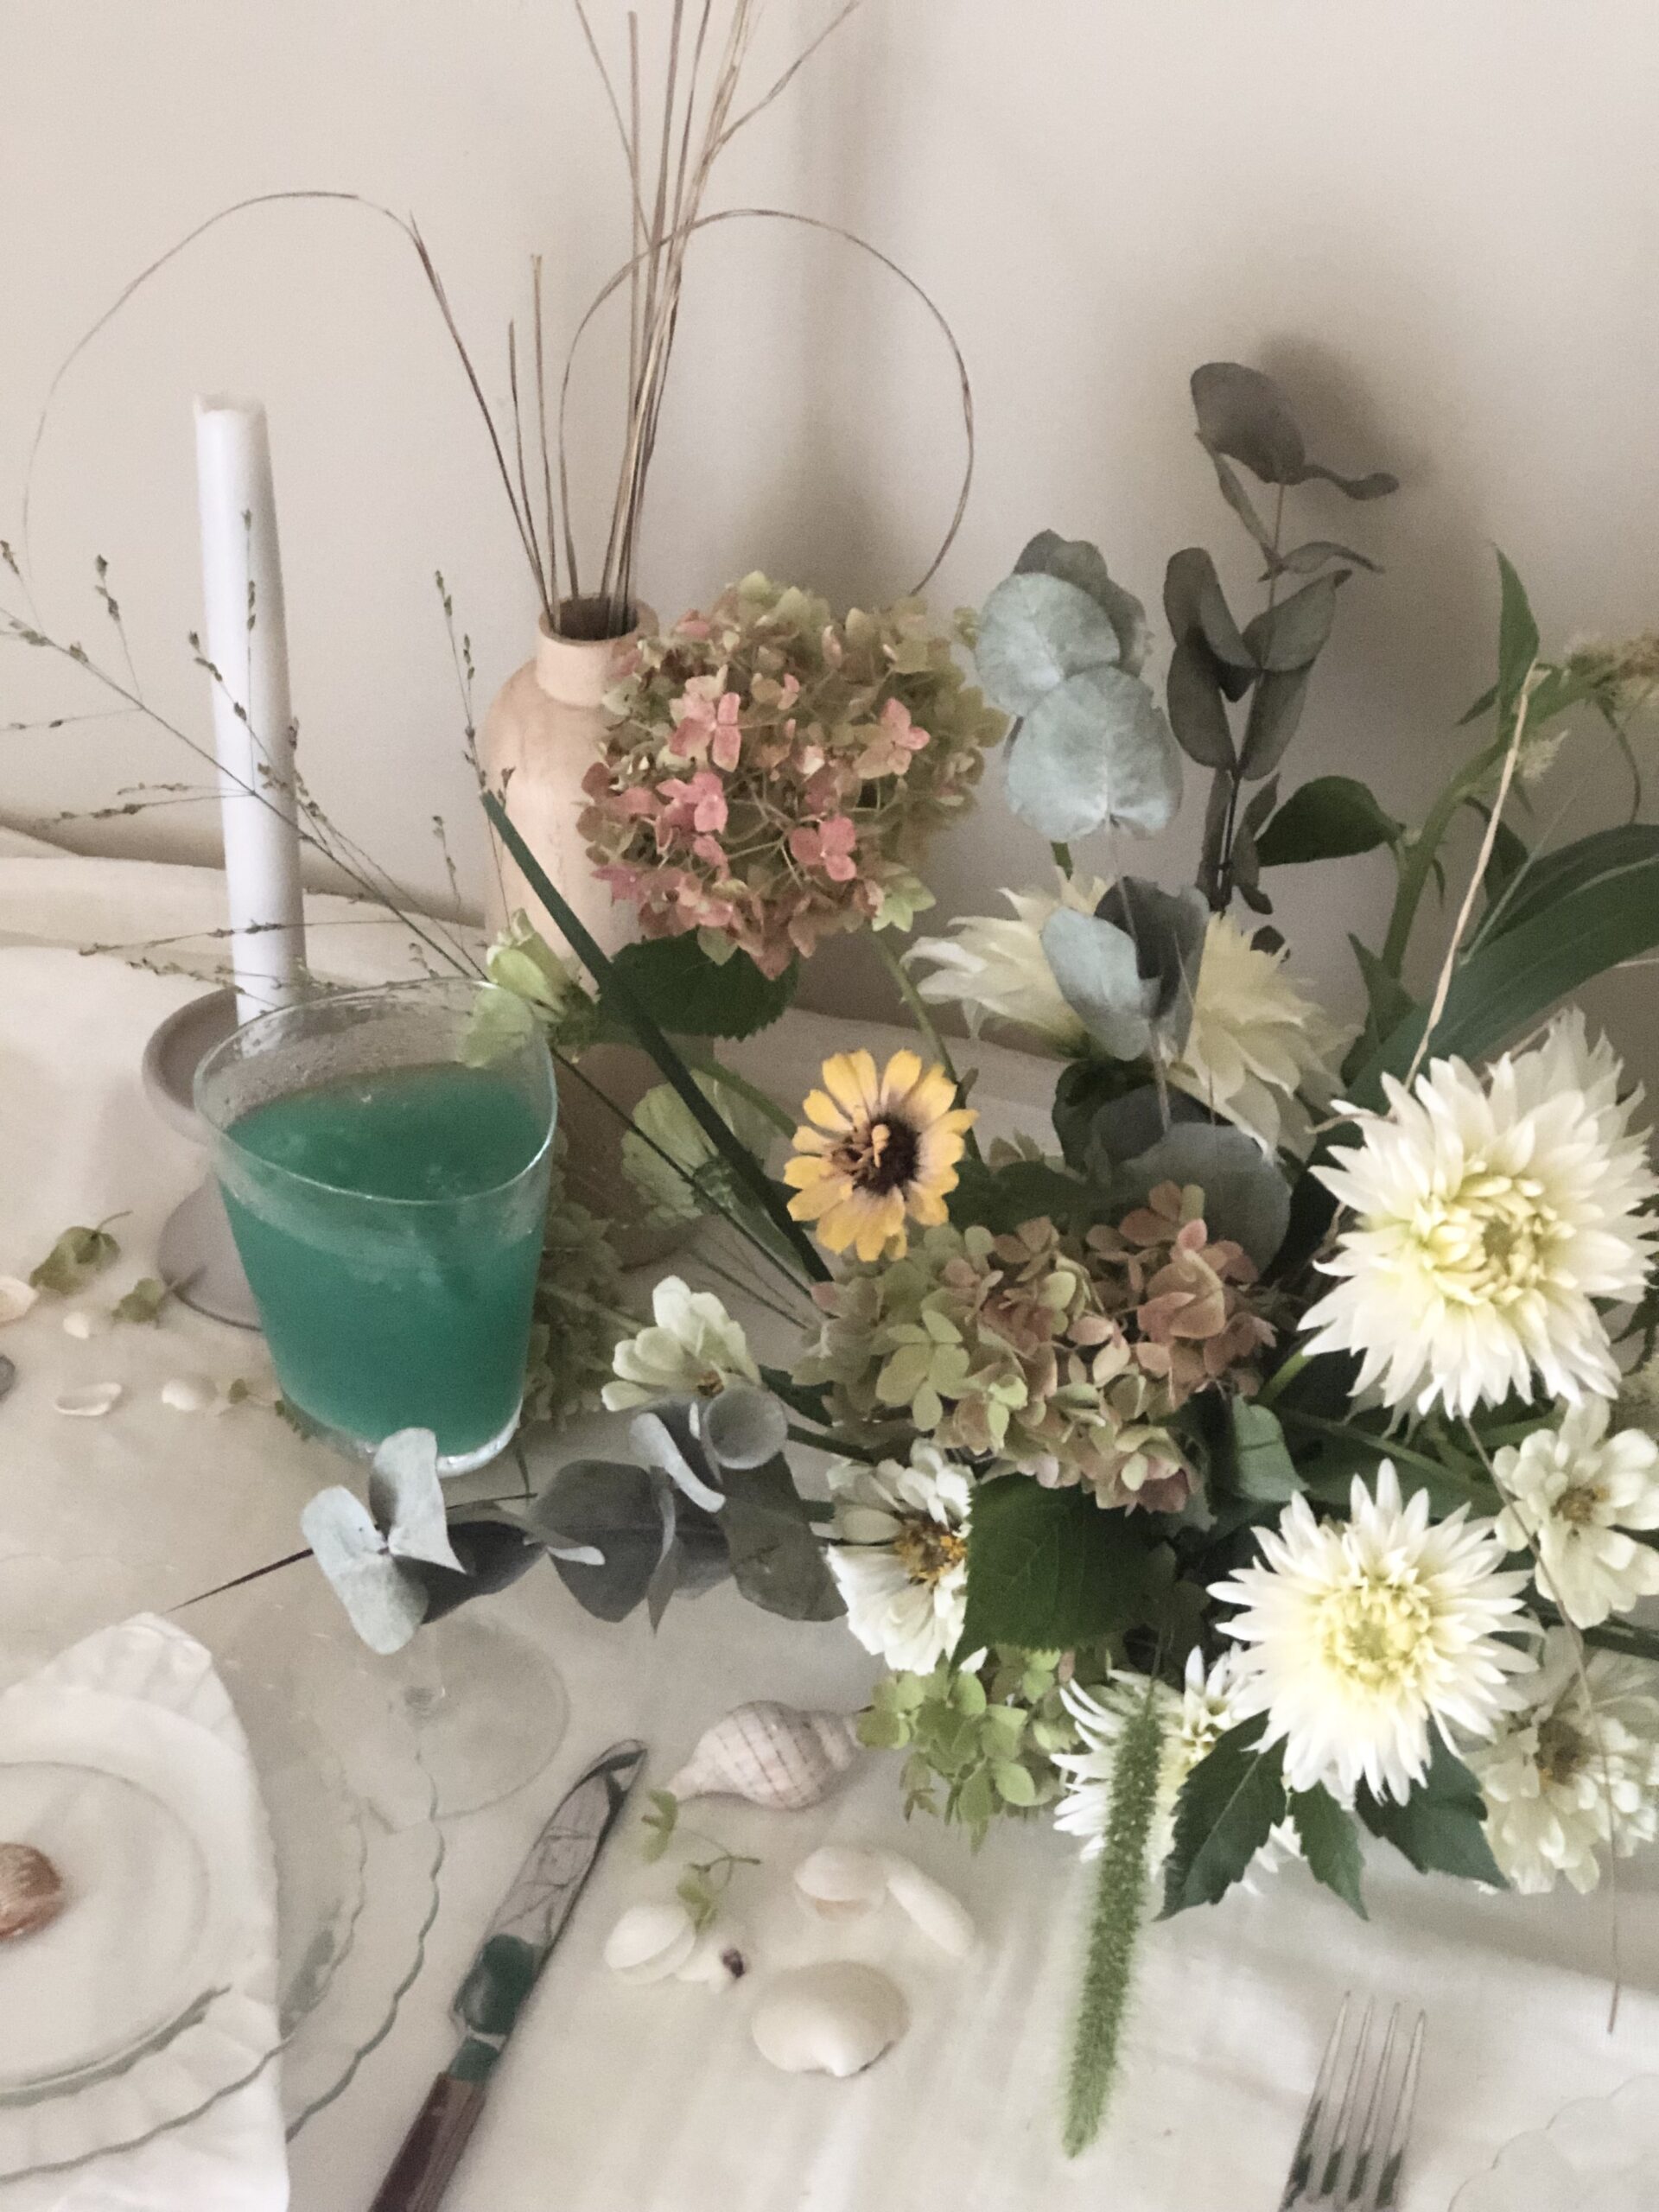
For arranging, I’m using a low bowl with a flower frog. This design turned out a little more on the wild side which is fun. That’s what I love so much about designing with whatever you can find at the moment – you never know how it’s going to turn out. As with most of my arrangements, I’ll do a final edit. So I’ll design it, take a step back and make any adjustments. For this arrangement, the hydrangea were looking too heavy so I took one out and cut it into a smaller piece. This is a great tip when you are working with hydrangea – you can cut a shorter piece and stick it deep into the arrangement for more overall depth as well as stretching out your product further.
WHAT I USED FOR THIS ARRANGEMENT:
- white dahlia
- peach + white zinnia
- greenish dark pink hydrangea
- creamy rooster cone
- foxtail and grasses
- dried baby eucalyptus which I did not pick from the garden – keep a bucket of dried stems to add in as a textural element
WHAT I’M DRINKING: mermaid water! It has the most pretty blue color which is hard to find in flowers, so adding in my blue color tone with this drink. This drink is a rum based drink. The first time I tried making it at home was on the video IG reel and I made it a little too strong (as you can see in the video lol). I tried out the recipe another time and think I found a good one. Here’s the recipe for 2 smaller drinks or 1 big drink (feel free to sub out anything): 1 oz spiced rum, 1 oz coconut rum, 1 oz blue curacao, 4 – 5 oz pineapple juice, half a lime squeezed in, and of course, garnish up as you’d like.

DESIGN TIPS FOR THIS ARRANGEMENT
- add in your heavy / larger flowers first – placing them closer to the vase so they have more stability
- semi group your colors / flowers together – doesn’t have to be exact, but it looks more cohesive when colors are grouped
- lastly add in any grasses – it’s okay if they move around a little, that just makes the arrangement look more natural
- if designing a full tabletop look, add in any shells or anything you brought back from the beach or anything that looks beach-y
- the blue drink really adds in that beach-y blue water color so it’s a must for this tabletop design
I hope you enjoyed my take on the beach into a flower arrangement as well as the table decorating. Check out the IG videos for more!
august flower garden: the hydrangea arrangement
Yes, I have a love for hydrangea. I’ve used them 2 different times already! It’s all about the variety. Some will bloom earlier in the summer (big fluffy hydrangea), some in the middle (the pink hydrangea), and now these (limelight and panicle ‘pinky winky’). If you plant a variety of hydrangea, you can enjoy them all summer long.
panicle hydrangea will start to turn pink as they age, so cut before if you don’t want the pink color in your arrangement
These two variety of hydrangea are newer to my garden – second year growing them. They have been very easy to grow and care for. For the most part, they get full sun. I cut them right as they turn white. These will change color pretty fast (especially the ‘pinky winky’ variety), so cut as soon as they turn the color you like.

WHAT I USED FOR THIS ARRANGEMENT:
- mostly the lime light hydrangea with pops of the panicle hydrangea because they were starting to turn pink and I was going for more of a white arrangement – both perennial (will last a good couple days after being cut)
- large container with smaller bowl inside with oasis
WHAT I’M DRINKING: my favorite matcha drink. This shaken iced matcha drink is my go to during the afternoons I need some extra energy. I have an IG reel on how I make this or the full recipe blog post.
When you have an odd shaped container (that could be it’s over sized or won’t hold water), it’s best to find a smaller container to place in the larger one. I know you can’t see from the photo, but I have a smaller bowl with a piece of oasis foam in the larger bowl.
This footed bowl I used is from CB2. It’s not made to be a flower vase, but that just goes to show you can get creative when selecting your arrangement vase. Exact one I used is linked below along with some other CB2 favorite pieces if you are in the shopping mood.
DESIGN TIPS FOR THIS ARRANGEMENT
- it will be easiest to use oasis foam because the hydrangea stems might be harder to work with and foam is a sure way to get your stems to stay in place
- you can re-use oasis as long as you keep it wet, you don’t want it to dry out but I will keep the oasis in the vase (keep watering it) then transfer it to my new vase or use the same vase
- a tip for re-using oasis is to try to not poke a bunch of holes into it which can cause the oasis to break apart over time
- I haven’t had much of an issue re-using the foam up to 3 – 4 times
- if you start to see / feel the oasis not be sturdy then it’s time to toss it
I hope you enjoy this last hydrangea flower arrangement for this summer. We still have a lot of dahlia and zinnia flowers growing, so stay tuned for those. For more summer flower garden videos check out IG reels at oliveandgene.
summer dahlia arrangements
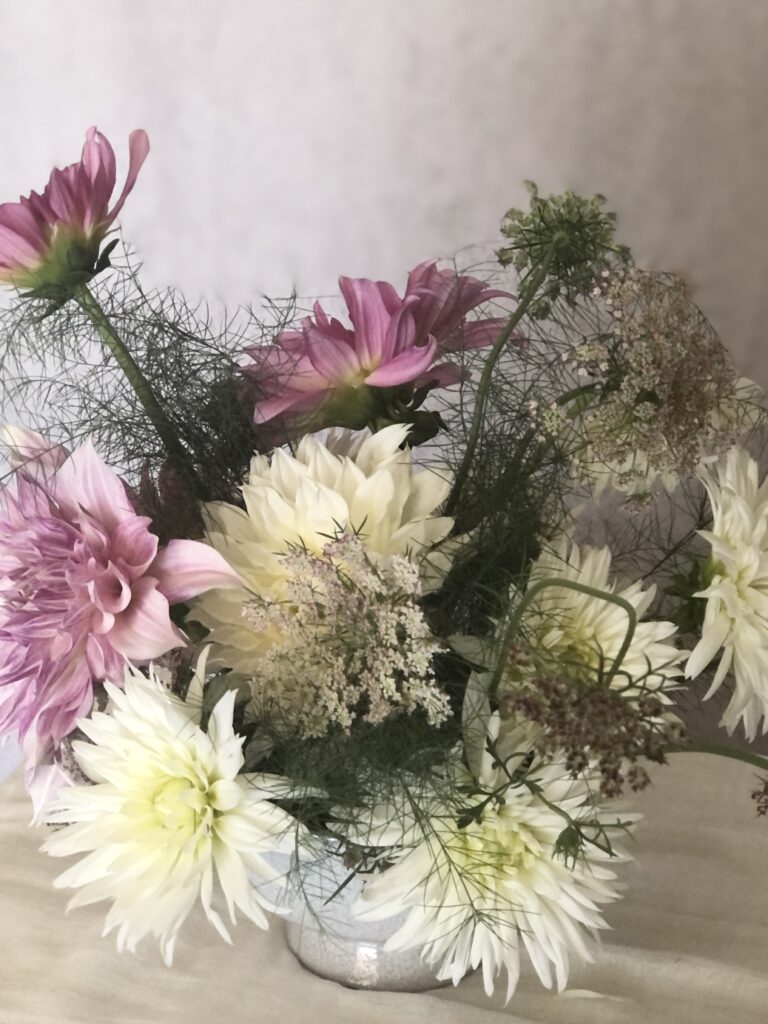
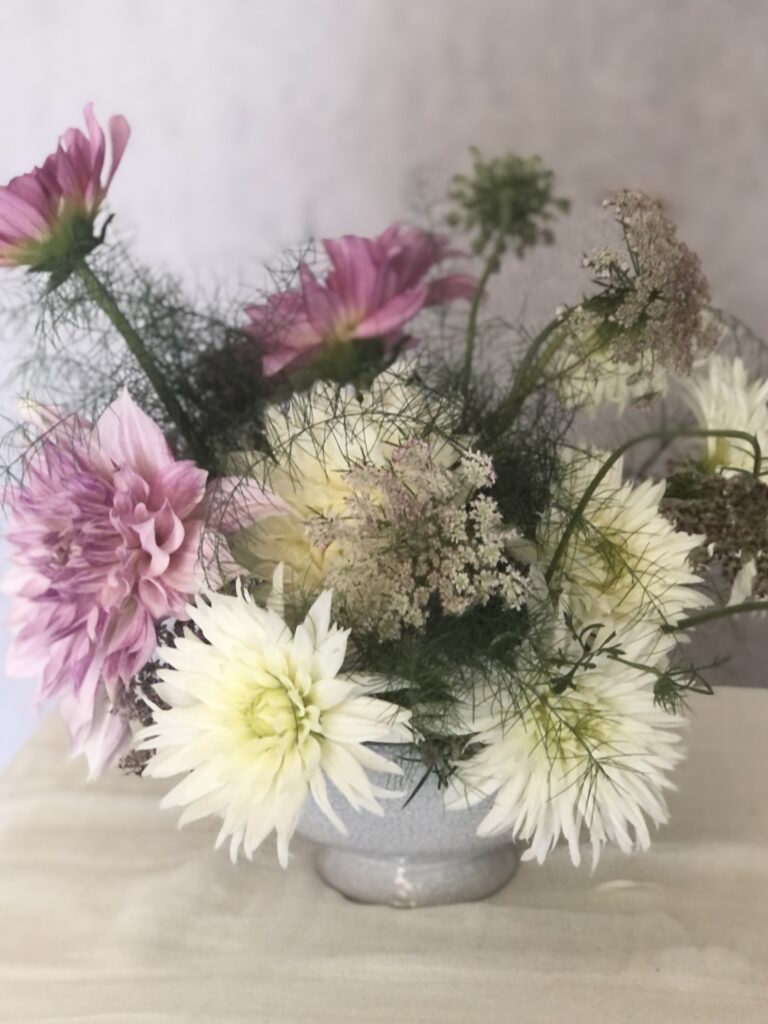
These next 2 dahlia focused arrangements are some of my favorites. I have quite a few dahlia plants growing in the garden. Over the years, the bulbs will start to grow which means lots more dahlia bulbs! Up first is this white and purple dahlia / chocolate queen anne’s lace arrangement.
If you want to try growing dahlias, it’s very easy. Buy your bulb, plant as directions say to, (make sure to put the bulb root side into the ground), water, and once they start to grow you can ‘pinch’ your plants if you want. I don’t always do this if I don’t have time and your plants will still grow great. Pinching is a good practice to follow if you have time because it will help your plants produce more blooms throughout the growing season.
What is to ‘pinch’ your flowers?! Simply it’s clipping off the top 3 inches of your plant after it’s grown to around 10 inches. You’ll want to find the point on your plant that is just above a set of leaves around 3 inches from the top. All this does is allow the plant to grow more branches near the base rather than growing extra tall (stems can break more easily if allowed to grow tall). Again, not totally necessary to do as I don’t always do this, and my plants produce beautiful blooms but I do tend to have more breaking stems as they grow pretty tall without the pinching.
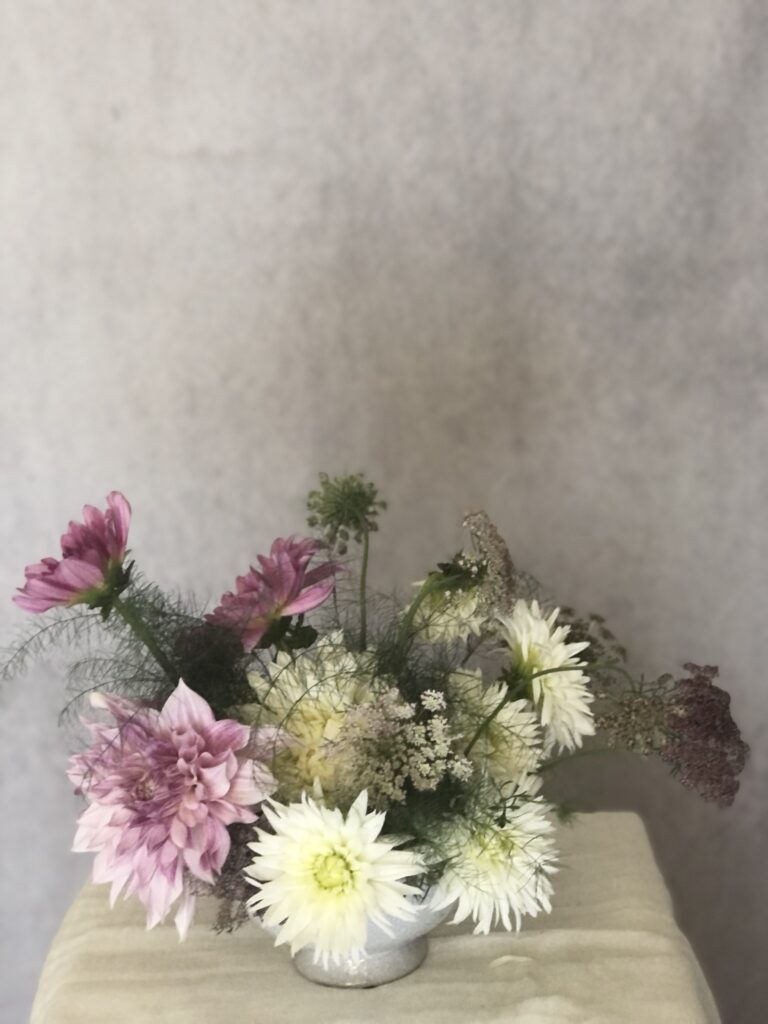
WHAT I USED FOR THIS ARRANGEMENT:
- white and purple dahlia varieties
- chocolate queen anne’s lace
- asparagus fern greenery
- ceramic bowl container with oasis
WHAT I’M DRINKING: iced latte. My each and every morning drink. 2 shots espresso with half coconut milk / half 2% milk, sweetened with honey. Delicious!
DESIGN TIPS FOR THIS ARRANGEMENT
- when working with oasis foam, you want to allow the foam to soak up as much water as possible by dropping into a larger container of water and not pushing on it – you want the foam to sink on it’s own (pushing into the water can cause dry pockets to form inside the oasis which we do not want)
- you will want to secure the foam into your container with tape if it’s moving around – if you get the foam in there securely, no tape is needed
- make sure to water your foam at least every other day – you do not want it to dry out
For the design video of this arrangement check out IG at oliveandgene and coming up next is our final dahlia arrangement of the summer. I can’t believe we are getting closer to the end of summer already.
 DIY Spring Backyard Picked Wild Flower Arrangement
 3 simple ways to arrange spring flowers
 two must have’s growing in your garden

Leave a Reply